Sunday 21 October 2018

Edging made from decking boards

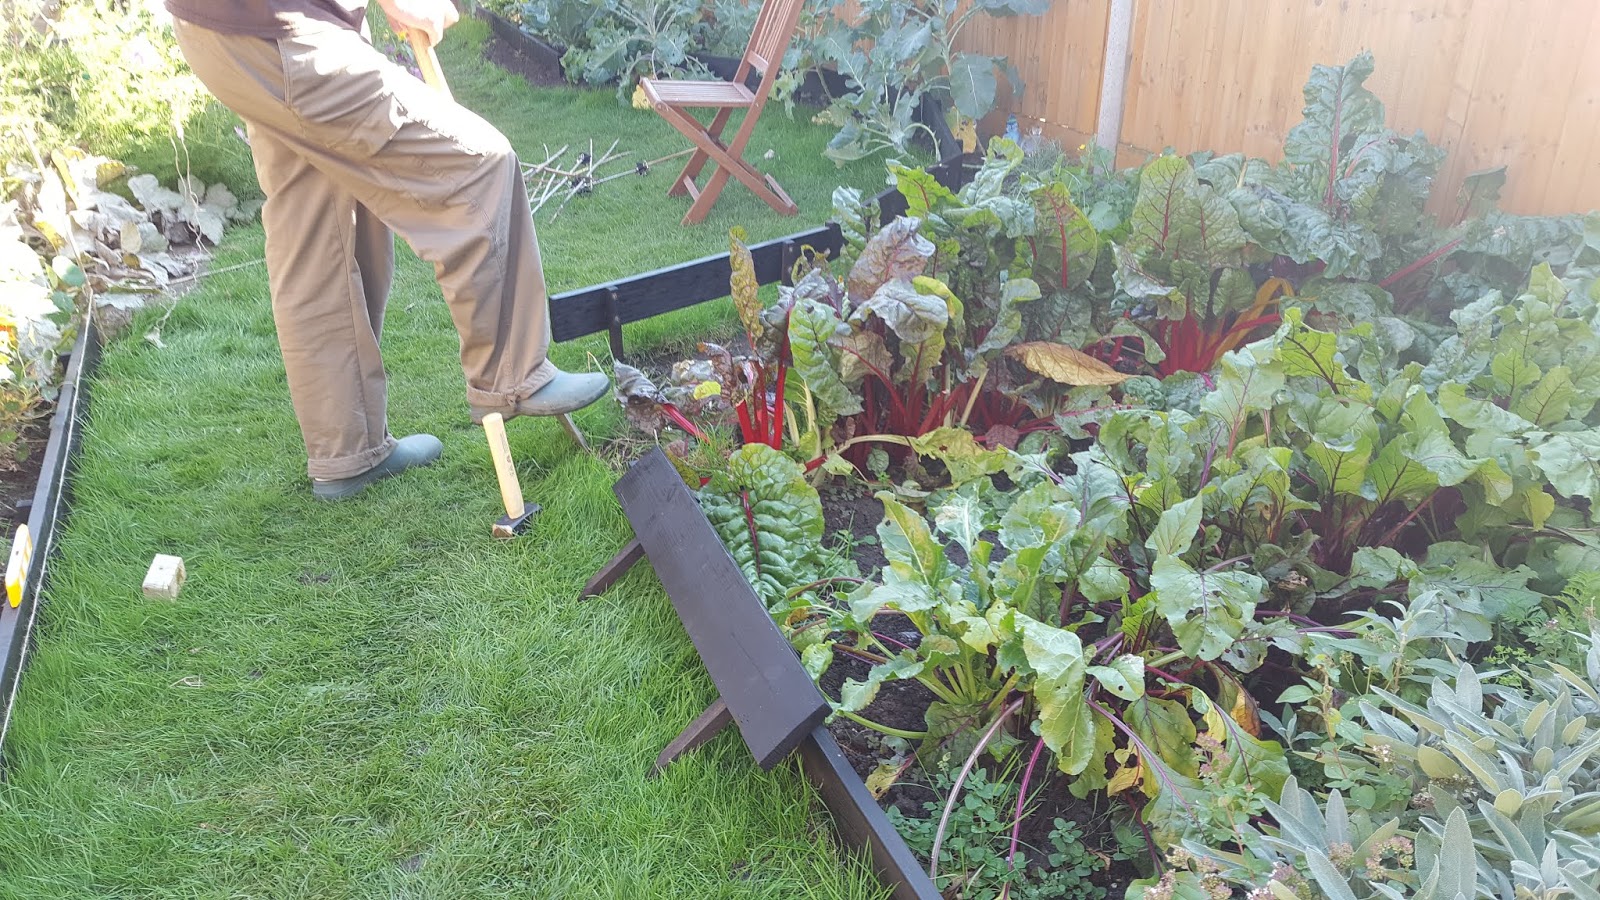
We have new edging round the beds in the garden.

It's made out of decking boards with wooden pegs screwed to them to stick them into the ground.
The first part of the project involved going to B&Q while the cheapest sort of decking boards were on special offer and buying a surprisingly large quantity of it. We needed more than would fit in the car on a single trip. In the next phase, my husband cut the boards into the lengths we needed for all the places where the full length of the board was too long and to go round the curved area of grass.
Then he stained all of the boards and the wooden pegs black and left them to dry. The logic behind the staining was that it should prolong the life of the wood. The logic behind the choice of black was that we already had some left over from the wood store and it should look good with that.
Finally, he screwed the stakes to the backs of the boards. We decided the side with the lines scored in them should be the backs (facing the beds), as we think grass would otherwise be likely to get stuck unattractively in there when we strim.
It looks particularly impressively neat round by the shed, where the narrow pieces of stone that weren't really wide enough have been replaced by large slabs and the beds have been sectioned off from these by boards.
My other half then reseeded the parts of the lawn that had gone bald or changed shape (he neatened up the shapes of a few of my beds and made lines straighter and less prone to random-seeming changes). It's about as late in the year as you can sow grass, so fingers crossed it starts to grow.
In other news from the garden, all of my cosmos is finally in full bloom.
It spills over the lawn and is a bit of a mess and I'm under strict instructions not to plant it again next year, as it refuses to flower for me until late September and gets huge in the meantime, but for now it is lovely.
Also, my biggest squash has unfortunately split and fluffy, white mould has got in, so I no longer have the delightful question of how to deal with cooking and eating a vegetable that huge. The cracks only spread to the top of it a few days ago, but when I turned it over there were even bigger cracks. I think it may have been like that for a while. In case it's related to all the rain we've had recently I took the other squashes inside to store for winter. They're currently providing a festive display on the dining room table. I am still keeping the cracked squash for seeds though. The person who gave me the seeds in the first place said the cracked one was bigger than hers ever grew!
Also, a couple of mushrooms popped up in the grass. I took this as a good sign that we have healthy fungal connections throughout the soil.

Saturday 13 October 2018

Honesty for flower arranging


Honesty is not the most attractive plant when it is growing. It's a biennial, which means it takes two years to complete its life cycle of growing, flowering and producing seeds. For the entire 15 months it was in the garden (it started in spring one year and completed its cycle in summer the next year), my husband complained that I had planted a weed. Here it is with its little serrated-edged heart-shaped leaves looking like a weed as a seedling:
Here it is at its absolute peak:
Here it is in May after it has flowered and started producing seed heads. Its leaves look a bit like nettles and its flowers are light-pink and look like weeds. I didn't think to take a photo of it when it started flowering before the seed heads appeared, but it didn't look any more attractive.
  It looks even worse from a distance:
However, looking like a weed comes with the advantage that it also grows like a weed. It's prepared to grow absolutely anywhere, even in areas with barely any soil that are always in shade. And it is worth growing at least as a once-off, so that you can use its seed heads as dried flowers. To do this, you need to leave it growing in the ground until the plant dies and dries out and all the leaves have fallen off. I harvested mine in early August this year. I had picked a couple of stems earlier because they were in the way of the shed door, but they went mouldy rather than drying out nicely. It may be possible to pick the stems earlier, but if you do, you'll need somewhere nice and dry to store them.

When you harvest it, you next need to remove the dull beige outsides of the seed head to reveal the shimmering moon-like interior. I found that the best way to do this was to bend the seed head near to where it joins the stalk of the plant. This released the outer skin of one side, which you could then just peel off. You need to do the same for both sides of the seed head, as there is an outer skin on both sides.


You can then arrange these in a vase like you would arrange any other flowers, only without water and they will shimmer in the sunlight.
How big your display of flowers will be depends on how big the plant grew and much you've picked. Some of my plants grew more than a metre tall. Ideally remove any snails you see on them, as the snails eat the seed heads as well as the leaves, leaving the dried plant less attractive

Sunday 7 October 2018

Misty morning reveals beauty of spider's web

It was a misty October morning when I looked out of the backdoor and thought "nah, this is not going to be a good day for drying washing, but wow, look at that spider's web on my sage and marjoram, it looks amazing in the morning mist".

It had barely been visible in the sunlight:

Incidentally, I was wrong about the laundry. The sun burnt through the mist, but by then it was too late to put a load on. Ah well, these things happen.