Saturday 27 May 2017

The tomato experiment - greenhouse v. outdoors - part 1

I've grown tomatoes from seed again this year. When it came time to plant most of them out, I decided it would be interesting to do an experiment to see how they fare in the greenhouse versus outside. On 27 May, the plants were still pretty much the same size. The ones in the greenhouse (repotted into bigger pots on 27 May just before measuring) were maybe a bit bigger, after their extra week in the greenhouse while the others hardened off outdoors ...

...but the difference was negligible.


The one on the right in the terracotta-coloured pot has a label that says Moneymaker, which makes it a good match for the greenhouse tomatoes, as those are also both Moneymaker. The one in the middle has a label that says "Rocket", so that doesn't speak well of my labelling practices, and, worse, the one on the left has no label at all. I only grew three types of tomato this year: Moneymaker, Gardener's Delight and ones that had self-seeded in the garden, which I took out and put in the greenhouse in pots. Based on last year's crop, the self-seeded ones must be Moneymaker, Gardener's Delight or a cross-breed of the two. The ones in the unlabelled pot and mislabelled pot could be any of those, but are most likely to be Moneymaker because most of my Gardener's Delight seedlings died this year (I think I planted them without enough compost over them, and I only had a few seeds left anyhow) and I'm pretty sure I have the two self-seeded ones correctly labelled and waiting to be planted out after our second water butt arrives. At any rate, I'll have a much better idea of what type they are when they start producing tomatoes, as Moneymaker tomatoes are much larger than Gardener's Delight.

I have now planted the outdoor three in this experiment outside (on 27 May).
The one that's definitely Moneymaker (at least according to my labelling) is in the far right corner near the greenhouse. I've been a bit naughty. Given that last year my tomatoes completely took over their bed and obliterated all the weeds in it, I've decided to grow this year's in among some flowers in the hope that the flowers will be pretty and then the tomatoes will take over everything afterwards.

The flowers are in fact a mixture of seeds that had fallen out of their packets in my bag of flower seeds (I keep my seeds in sandwich bags by type so I can find the ones I want more easily). Based on the leaves, I'd say I have ornamental poppies near the path and love-in-a-mist further back. I have the suspicion that the tomatoes are going to take over everything before the others manage to flower (partly because I came up with the idea too late to plant love-in-a-mist in time to flower at their earliest), but we shall see.

For this experiment, I'm interested in:

* which tomato plants flower and produce fruit earliest,
* which get biggest
* if there is any clear difference in the amount of tomatoes produced
* any difference in problems (greenfly, disease etc.).

My plan is to try and feed the ones inside and outside the greenhouse once a week (or at any rate, on the same day as each other).

In other news, all the corn is now planted.

And most (but not all) of the plants that are going to be planted have been:


Monday 22 May 2017

A busy season in the garden

May is a busy month in the garden. A lot of plants go in and a lot of things grow. On 10 April, the garden still looked like this:
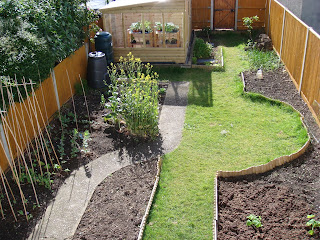
The mustard (the patch of plants by the bend in the path) was still tiny and I was still kidding myself that I might eat some of it. We hadn't yet got the shed or the water butt and no annual veg except the onions, last year's leeks and the mustard had been planted out. Although at this stage I was already growing broad beans outdoors in pots and had planted a ton of seeds that were living indoors.
By 14 May I had several courgettes and squashes in the ground and already had a variety of peas and beans in.
The mustard had begun flowering, although it was far from reaching its full height. I'm actually currently growing it for its appearance, because the seeds it produced last year tasted pretty disgusting. I'm going to try and harvest them earlier this year to see if that improves things, but I don't hold out too much hope.
At the back on the left of the gate we'd also planted our first climbing rose. It's an Iceberg rose and will have tons of big, white flowers. It gets afternoon sun, and once it makes it to the top of the fence, it'll get sun all day. Since then, we've planted a second Iceberg Climbing Rose on the right-hand side of the gate.
The problem with this is, with the possible exception of midday in summer with the sun directly overhead, this particular corner of the garden never gets any sun. I've never yet even caught it getting sun at noon (possibly because I haven't been looking at the right time). The above picture was taken at 10.55, roughly two hours before London's solar noon (1257 pm today). And here it is at solar noon, catching the sun on a tiny proportion of its foliage:
It's possible the rose on the right won't make it, but if it can hang on in there until it gets to the top of the fence it will be fine. The plan is for the roses to be both beautiful and a security measure to stop anyone climbing our fence. My other half has promised to add some trellis for them to grow up before they reach the fence (ideally it should have gone in before they did, but I lost that argument, partly due to my excitement at the prospect of buying roses).
I also yesterday made a start on planting out the sweet corn. It's really loved growing in the greenhouse, and my other half says it's bigger and healthier than he's ever seen me grow sweet corn to the planting-out stage before.
That entire bed will be filled with sweet corn by the time I'm done (I hedged my bets by planting some of it out now and leaving some of it till later).
In somewhat sadder news, I've caught the first tiny spots of powdery mildew on my cucurbits already and ripped the leaves off to stop it spreading. It clearly relates to how wet they get, as the spares in the greenhouse are completely free of it. I'm going to have to be a lot more careful about not getting them wet when I water and maybe spray them with diluted neem oil or milk to stop the mildew sticking to them after big rains (the problem with that being I can never find a spray bottle prepared to carry on doing a decent spray with anything stronger than water in it).

Sunday 21 May 2017

How much water can you collect with a water butt?

A lot.
My other half has set our new Wilko's 250 litre water butt up, which is superb.
There are just three problems with it.
1. The lid doesn't quite fit on properly (possibly needs a bit of filing down).
2. The tap has a permanent drip of dozens of drops per minute (we've contacted Wilko's, as no one complained about that in the reviews), and
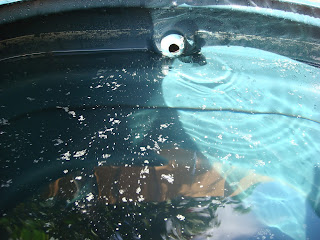
3. After just 3 days of May rain it's already full!
All 250 litres! And I thought that it would take weeks of rain to fill it.
That's what happens when you collect rain from a 16 x 9 ft roof I guess. I suspect some of it ran off, because it looked like it had reached the very top. Our current solution is to use the water up on the garden whenever it even needs it a little bit. We may ultimately need a second water butt.
The back of our water butt (and I would think any water butt) has a T-section on it where the water comes in. All you need to do is take the cap off it and attach it to the T-section of the next water butt with a hose.
Currently, the water comes down the down pipe into the diverter.
It fills the water butt until it's full, then any extra water simply continues on along the down pipe. Unfortunately, our down pipe doesn't end anywhere that can take a lot of extra water. We simply added bends in it to funnel it away from the shed to between the water butt and the compost bin.

From there, it will gush out over the garden instead of making the shed base subside or water-damaging the fence or the shed. Which isn't bad, but it's not ideal either. I guess we'll soon find out how much damage water gushing all over the vegetable beds does.
In other news on fixing things, my other half also came up with a solution for how I can leave the greenhouse door open to keep the greenhouse cool. The door being made mainly of a huge sheet of glass, we didn't want it slamming and breaking in the wind. What he did was attach a cabin hook.


It's 30 cm long and I hook it on when I want to keep the door open to cool down the greenhouse – like today, when it got to 33° C, even with the door open.
I bought a temperature logger to find out how hot and cold it gets. I'm not yet sure what I'm going to do with the data, I just feel like I should have it. The data logger records a temperature reading every 30 minutes (or whatever interval you set it up for) and you can plug it into your computer and download the data from it. Alternatively, you can just press the play button and it'll show the current temperature on its screen. Frighteningly, in the two weeks I've been collecting data from 7 to 21 May, the top temperature was 43.3° C at 12.57 pm on 10 May and the lowest temperature was 2.2° C at 5.57 am on 10 May. I wasn't expecting it to drop so low, but on the plus side it didn't freeze. It's strange that my high and low were on the same day. It makes me wonder if something happened to distort the data or if it was just a very cold night followed by a very sunny day.

Flowers in the herb garden in May

It's May, the sun is shining (finally, after buckets of rain) and my herbs are flowering in a variety of purples. This includes a herb I didn't realise could flower: sage. It's gone through an interesting set of stages, where I wrongly assumed that the beige, papery middle stage meant the flower had died already,  and I wasn't expecting the final flower to be purple.


The thyme is also flowering.
In fact it's covered in flowers.
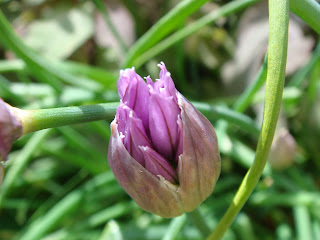
And the chives are going for it too.


 The parsley is also clearly having a think about flowering, but it's not got there yet. Also, I think it's likely to prove an exception to my purple herb flowers and come out in white.
Sadly, flowering doesn't do good things for the flavour or toughness of herbs, but at least the bees are loving it.

Monday 1 May 2017

The new shed/greenhouse combo has arrived

It was installed on Friday by the company that made it and we've started transferring things into it. In case you're thinking "that's the shed of my dreams, where can I get one?", it was made by Himley Garden Buildings. They were very flexible about design and were even happy to include a gutter along the back for me.

The shed part is slightly larger than our previous shed, which is handy. But the truly exciting part is the greenhouse - which has real glass in it. Having initially planned to get a shed then add a separate greenhouse later, I'm so pleased I got a combined one. The greenhouse part is much bigger than I was expecting to be able to fit on the base and its shape is a perfect match for the shed. So it looks sleek and planned instead of my original design of mismatched and makeshift.


My big question now is: should I fill the greenhouse to maximum capacity with plants or would it be nicer to fill only the front of it with plants and put in a chair or two in for reading on days when the garden isn't quite warm enough, but the sunshine is glorious. I'm currently leaning towards the chair idea. I can always do it temporarily and then discover my plant urge has filled the whole thing and the chairs have to go.

Because of the guttering, I'm having to move the compost bin to make room for a water butt. The good news is that roughly the bottom half of the compost heap turned out to be good, usable compost, albeit possibly not up to the standards of Monty Don's home-made compost. It's been rotting down for 2-3 years now. But it still had big bits of sticks and roots in it that had to go straight back into the compost bin because they hadn't rotted down. This is largely my fault, as I didn't chop them up before putting them in. Also my back was very weak when I started the compost heap because I didn't go to the gym back then. That meant I couldn't stir it much to get air into it and mix what I put into it. Well, that and the awkward design of the bin, which makes stirring the compost with the garden fork difficult even with a strong back. The combination of the two means I had far from optimum composting in my bin, as revealed by the imperfect state of my compost.

My initial plan was just to pull the bin off the compost, but it was wedged on too firmly. Instead I forked the compost out of the top of the bin and into a pile next to it. After I got about a third of the way down, I managed to wiggle the compost bin enough to pull it off the top and put it over my new pile. I had to keep digging for a while before I got down to the decent compost.
I've saved myself a little bit in composted stable manure this year. I reckon this was a couple of big bags worth. I've mainly scattered it over where I'm going to plant the sweetcorn, plus some extra on the cucurbit bed and around the brassicas.

We've expanded the cucurbit bed (on the right in the picture below - cucurbits this year only because I'm using crop rotation). I should have plenty of room for my squashes, cucumbers and courgettes now. The remainder of the garden compost has gone on the cucurbit bed. Squashes love plenty of organic matter, so I'll be adding composted stable manure before they go in.