Sunday 28 September 2014

Runner beans, black fly and EU law

My poor old runner bean plants. They've survived through near fatal slug and snail attacks thanks to my use of a slug ring. They then revelled in the opportunity provided by our unexpected and balmy Indian summer to grow to a fairly decent size (several feet tall), only to be attacked by hordes of black fly (a type of aphids that are black in colour).

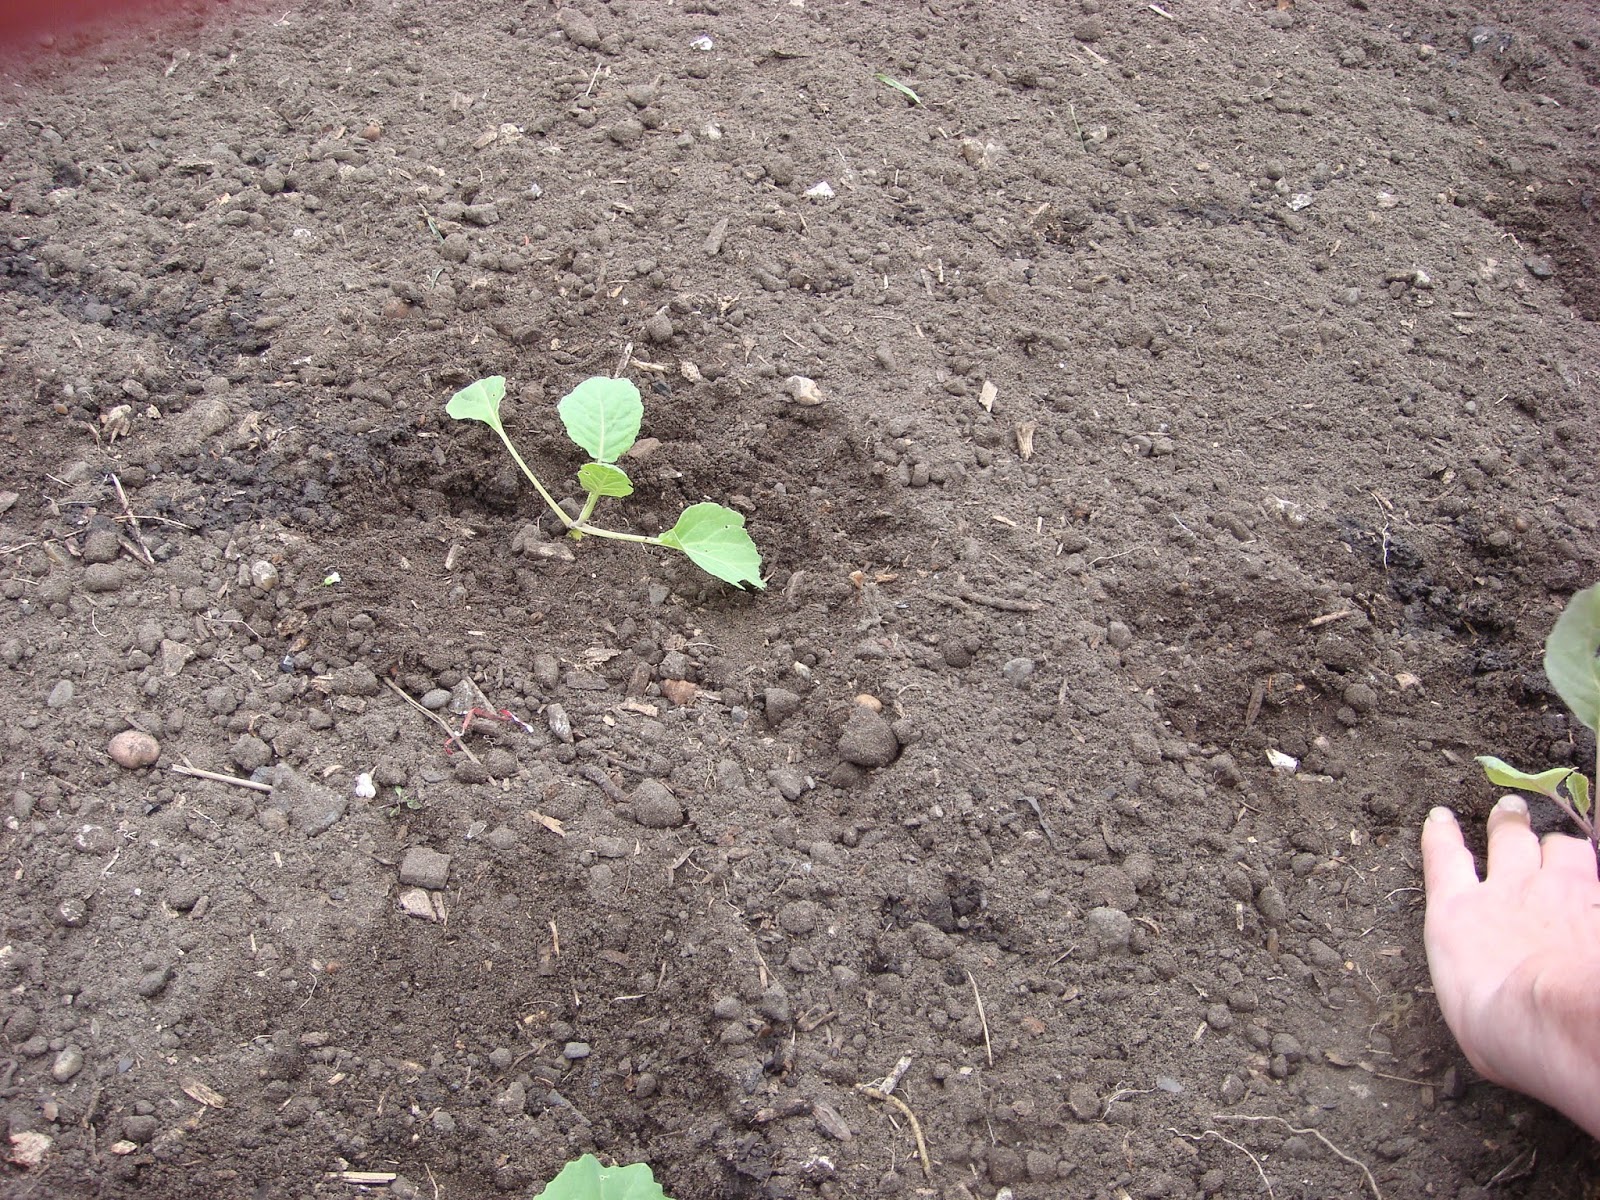
Now, the standard gardening remedy to aphids (whatever their colour) is to mix a squirt or two of washing up liquid up in a spray bottle full of water (no more than about a teaspoon a litre) and spray the aphids with it. This suffocates the little blighters. I'm a bit hazy on the scientific details, but basically post-spraying, the aphids die. If you miss any, those aphids survive, so you need to be thorough and make sure you've done all the stems and undersides of leaves. Also the spray does nothing to prevent new aphids from finding your plant and settling on it to breed. In other words, you have to keep respraying to keep the aphids off. It's a great remedy, as it's highly unlikely to harm anything you haven't sprayed with it (people had been doing it for years before bees started dying inexplicable deaths). The only downside is the plant tends not to be terribly keen on being sprayed with washing up liquid (although the weaker the solution, the better the plant tolerates it, so the real trick is to add just enough to do in the aphids and not enough to do too much damage to the plant).

Black fly on my runner bean plants
Unfortunately the EU doesn't see it that way. Or more accurately, the EU decided to pass a seemingly sensible law banning untested pesticides that had the (unforeseen?) side effect of making home-made remedies such as this (and as far as I can make out, my beer traps too) illegal.

Now. I have no wish to become an EU test case and discover whether they really would prosecute a gardener for spraying aphids with highly diluted washing up liquid, I don't even want to find out whether the suggested defence of "I wasn't using it as a pesticide, I was just using it to wash my plants, the deaths of the aphids were coincidental" will work (according to one article I read, you have a good shot with that defence and a pretty good chance of not being prosecuted at all, as this is certainly not what the EU law is setting out to prevent, it's trying to prevent people from using chemicals even more dangerous and unproven than those already commercially available), so I will not be specifying the means by which the aphids on my plant met their deaths on this blog. What I will say is that if you live outside the EU, regularly spraying with a tiny amount of washing-up liquid diluted in a lot of water is an excellent and safe way of killing aphids (as I know back from my rose growing days before the EU created this law), and that if you want the aphids not to suck the life out of your plant you need to kill them somehow.

Dead black fly on my aphids
If you live inside the EU and fear that it may actually choose to apply this law to you, you can buy an organic spray (this is definitely a lot more expensive than the washing up liquid remedy, but may actually be a good option). Your other cheap option is to squash them to death with your fingers (wear gardening gloves, they're disgusting and sticky when squashed). I'm working on the basis here that you wouldn't fall foul of the law because your fingers wouldn't be regarded as a pesticide (and not that anyone's done the scientific tests to prove that killing aphids with your fingers is safe and effective).

Your remaining option is to buy a commercially available non-organic spray that will kill off a wide range of insects, not just the aphids and may or may not be implicated in colony collapse disorder. On the plus side, some of these are much longer lasting than the washing-up liquid and squashing aphids with your fingers. On the minus side, you will be coating your food crop in a toxic chemical. Indeed, if you're growing a food crop, you will need to make absolutely sure that the pesticide you use says it's safe for your specific plant (and wash your plant very thoroughly before you eat it, those pesticides are nasty and dangerous).

How to plant potatoes

I learned something I didn't expect today about planting potatoes. You don't plant them like any other plant I know of. They start off simple enough.
You dig a 30 cm (12") trench with all the soil piled up on one side, and pop the potatoes in. The BBC website says you plant early potatoes about 30 cm (12") apart with 40-50cm (16-20") between the rows, and second earlies and main crops about 38 cm (15") apart with 75 cm (30") between the rows.
Now comes the strange part. You only fork about 5 cm of soil from your pile back over the potatoes and leave the rest piled up. You then wait until the potato crows about 15 cm above the soil covering it, then fork more of your pile of earth over it until it is covered up to just below the level of its lowest leaves. You then wait for it to grow 15 cm above the soil again, and fork soil from your pile over it until it is covered up to just below the level of its lowest leaves again. You keep doing this (wait for 15 cm of growth then fork the soil over to just below the level of the lowest leaves) until you have no soil left in your pile. This will probably mean that your potatoes end up growing in a little mound of earth by the time you've finished, as replacing all the soil you dug out of the trench on top of the potato plant is likely to put leave you with a mound a little way above ground level. Oh yeah, and don't forget to water them after you've planted them.

Two other things: firstly, you need your potato to chit (that means sprout little green bits) before you plant it - those are going to be its stalk and leaves, so ideally they should face upwards. Secondly, you're wasting your time planting potatoes in September. This isn't the right time to plant them and we planted ours for demonstration purposes only.
Actually, while I'm on the topic of potatoes I learned two other things:
1. The green sprouts they grow are poisonous. Don't eat them, you need to nip them off before you eat a potato if it's chitted (after that you can eat it again).
2. When you harvest your potatoes, you'll almost certainly miss one (or even a tiny bit of one). These are known as volunteer potatoes and will grow again next year. However, because crop rotation is important, you'll be growing other veg in that bed next year, so simply weed the potato out.

Week 3 of the gardening course: how to plant seeds and seedlings

This week's lesson was on seeds, seedling and planting them. It turns out that seeds contain the makings of a whole plant inside them, just waiting to get out:
All they need to germinate is warmth and water. That means you can even germinate them in an airing cupboard. But once they've germinated, they need to come out of the airing cupboard pretty quickly, as they start having a whole host more needs. At that point, if you leave them in the airing cupboard they'll go all leggy because at this point they need light (and if you leave them in the dark, they'll grow overly tall and thin trying to find it). They also need nutrients and carbon dioxide (not that there's any lack of that in your average airing cupboard). Basically, you now need to put them somewhere light, still warm enough for them and provide them with water, and in most cases also soil or compost. It's generally pretty sensible to have provided them with these things (with the possible exception of light) while trying to germinate them too.

Here's us doing some practical work and planting some seeds:
These trays are suitable for little seeds - like lettuce seeds (any seed that's smaller than a few millimetres). Bigger seeds - like beans - would need to go in deeper pots. We put a piece of newspaper in the bottom as it stops any of the compost falling out the holes in the bottom.
Then we filled the seed trays with compost and patted them down so it was nice and firm.
Step 3: read the seed packet, see how deep the seed needs to be and make a trench that deep (with your finger or a pen or something similar). Scatter in the seeds - we were aiming for about twenty in total in each tray, divided over two rows. Some may not germinate, so you aim for a few more than you need, but there's not point in putting 50 in (unless you live with a truly huge group of people) as you just won't need that many lettuces.
We then covered over the trenches by knocking compost back over them.
Step 4: make a label. If you use plastic labels and write in pencil like we did, you can rub the words off with a cloth at a later date and use them again next year. The label should include both the name of the plant and the date.
Finally, and very importantly, water them thoroughly (the two things seeds need to germinate are water and warmth), then put them somewhere warm and wait for them to grow.

We also planted out some seedlings that had already previously been grown in seed trays.
First you gently extract a few from the tray, then gently pull them apart so that the roots separate from each other and you have individual seedlings. You should be fairly gentle with them, but you're bound to break some of the roots off. This doesn't matter, the seedlings can cope.
Dig holes at the correct distance apart. It'll tell you how far on the packet. These were cabbages and we were putting them in at 45 cm apart. Unlike with planting seeds, when you plant seedlings you're supposed to water the hole first. It gives their roots a better chance of taking to their new home.
You can (and even should) plant brassicas like cabbages with a fair amount of their stems buried under the ground, but with all their leaves and their stalks above the ground. Push the soil in around the plant and firm it down with your hands. It should be pretty firm, If you pull on the plant by one of its leaves, the plant should remain firmly embedded in the ground.
We then added these cut out bits of bottles. They give the seedling some protection against slugs.
 The next step: water them again.
Because brassicas are greedy feeders (they need a lot of nutrients), our teacher, Simon, added some hop manure pellets. You'd probably need to add another form of fertiliser, as he said these weren't commercially available any more. Our cabbages got the pellets because because that was what he'd happened to find in the shed.

Tuesday 23 September 2014

Crop rotation - the plant families

This week's gardening course lesson was on crop rotation. Those crops that grow from scratch every year (as opposed to those that grow on plants that remain in place year after year such as fruit trees, raspberry bushes and asparagus) should be grown in a different part of your plot each year (i.e. rotated between the areas or beds you use to grow vegetables). This helps prevent the build-up of soil borne pests and diseases. If you put the same vegetable in the same place year after year your yield from it would fall, the health of the soil would decline and you'd see a build up of pests and diseases.

But it's a little bit more complicated than that. For instance, there's no use in putting in cabbage one year and replacing it in the next with radish, because, weirdly enough, both are brassicas, so they are prone to similar diseases and pests and needs similar levels of nitrogen.

The first step in planning your crop rotation is to work out what food plant family your plant belongs to. Here are the groups along with a list of key vegetables that belong in them. There are some surprises in there (especially vegetables that you would think would count as roots, which are actually in another family):

The Brassica Family
  • cabbages
  • Brussels sprouts
  • cauliflowers
  • radishes
  • broccoli
  • calabrese
  • swedes
  • turnips
  • rocket
  • Chinese cabbage
  • cress
  • kale
  • kohlrabi
  • land cress
  • mizuna
  • mustard
  • oriental mustards
  • pak choi
  • salad rape
  • seakale
  • agricultural mustard
  • fodder radish

The Root Family
  • carrots
  • parsnips
  • celery
  • coriander
  • dill
  • parsley
  • celeriac
  • Florence fennel
  • Hamburg parsley
  • skirret
The Legume Family
  • broad beans
  • runner beans
  • French beans
  • mange tout
  • peas
  • asparagus peas
  • lablab beans
  • any other form of beans
  • alfaalfa
  • clover
  • fenugreek
  • field beans
  • lupins
  • trefoil

The Potato Family
  • potatoes
  • aubergine
  • peppers
  • chilli peppers
  • tomatoes


The Beet Family
  • beetroot
  • chard
  • spinach
  • Good King Henry
  • leaf beet
  • red orache


The Allium Family
  • onions
  • garlic
  • leek
  • shallot
  • chives
  • bunching onions
  • spring onions
  • Welsh onions


The Cucurbit Family

  • cucumber
  • courgette
  • marrow
  • melon
  • water melon
  • pumpkin
  • squash
  • summer squash
  • winter squash


The Lettuce Family
  • chicory
  • cardoon
  • lettuce
  • endive
  • cardoon
  • globe artichoke
  • Jerusalem artichoke
  • salsify
  • scorzonera


Other (also known as orphans) - they don't belong in any other group or really together
  • sweetcorn
  • sweet potato
  • asparagus
  • sorrel
  • Chinese artichoke
  • corn salad
  • New Zealand spinach
  • sorrel
  • summer purslane
  • winter purslane
  • buckwheat
  • grazing rye

So, when you're trying to work out your crop rotation, you should try and include all the vegetables you want to grow in a single bed or area to be rotated so vegetables from the same family don't end up in the same area more than once in your rotation. But, you can include vegetables from more than one family in each bed to be rotated.

But in addition to taking plant families into account, some plants need different levels of nutrients in the soil. Some plants fix nitrogen in the soil (i.e. they add nutrients), some are greedy feeders and need lots of nitrogen, some need lower levels of nitrogen (because if they have too much they grow funny) and some are neutral - i.e. they can take any level of nitrogen and can be planted together with plants of any of the other groups.

The ideal pattern for plants in a crop rotation is that nitrogen fixers should be followed by greedy feeders, which should be followed by plants needing less nitrogen (which should then be followed by nitrogen fixers again). If you can't put nitrogen feeders in before greedy feeders, then you should feed the soil over winter before planting the greedy feeders.

Here are the groups:

Nitrogen fixer Greedy feeder Less nitrogen Any level of nitrogen
legumes,
e.g. peas, beans
brassicas
cucurbits
potato family
alliums
sweetcorn
root family lettuce family
beet family
orphans (except sweetcorn)

Other facts worth taking into account (once you've got to a more advanced level, they might be too much to cope with in your first attempts at rotation):

  • If you are repeating a crop, such as potatoes, within a rotation, the two occurrences should be as far apart as possible.
  • Potatoes and cucurbits leave a clean soil and are good to precede root crops, which benefit from a clean seed-bed.
  • If you need to lime soil for brassicas, don't follow them immediately with potatoes (lime encourages potato scab).
  • Although the rules theoretically mean you could grow tomatoes alongside potatoes (as they are both in the potato family), the risk of potato blight spreading to your tomatoes is high enough that it's better to grow them as far apart as possible.

You can rotate crops on a four year or a six year (or presumably also a five year) basis. The crops should be rotated like this in a four year rotations:

Year 1 Crop A Crop B Crop C Crop D
Year 2 Crop B Crop C Crop D Crop A
Year 3 Crop C Crop D Crop A Crop B
Year 4 Crop D Crop A Crop B Crop C

The Royal Horticultural Society's website suggests this crop rotation:

Year 1LegumesBrassicasPotatoesOnions and roots
Year 2BrassicasPotatoesOnions and rootsLegumes
Year 3PotatoesOnions and rootsLegumesBrassicas
Year 4Onions and rootsLegumesBrassicasPotatoes

If you want to do a six year rotation, here's the pattern:

Year 1Crop ACrop BCrop CCrop DCrop ECrop F
Year 2Crop BCrop CCrop DCrop ECrop FCrop A
Year 3Crop CCrop DCrop ECrop FCrop ACrop B
Year 4Crop DCrop ECrop FCrop ACrop BCrop C
Year 4Crop ECrop FCrop ACrop BCrop CCrop D
Year 4Crop FCrop ACrop BCrop CCrop DCrop E

Tuesday 16 September 2014

Tips for making compost (organic matter your garden will thank you for)

The fact that you need to add organic matter to pretty much every type of soil means you need to know what sort of organic matter to add. Slugs are technically organic matter, but you don't want to go growing your vegetables in a sea of live slugs, for instance (although I do seem to be accidentally making the attempt).

Meat and dairy are other no-nos. They attract vermin. What you want is compost:
The composter that came with the garden
Which leads to the question of where do you get compost from. Obviously, you can buy bags of it from a garden centre, but, for a much smaller investment in cash, but an admittedly bigger investment in time, you can make your own (and get rid of your garden and some kitchen waste into the bargain), so here are some tips for making your own compost.

Things you can compost:
  • grass clippings
  • leaves, stems and flowers from weeds
  • roots from weeds or other plants that you know the plant can't grow back from
  • vegetable peelings
  • raw vegetables
  • roots of perennial weeds or plants that have been soaked in a bucket of water for 6 weeks (this is excellent news, I thought I had to put my dandelion roots in the green waste the council picks up, but actually, I can just drown them into a state of decay they can't recover from)
  • twigs and branches if small or chopped up small
  • hedge trimmings
  • dead or unwanted plants (if undiseased)
  • hay/straw
  • paper or cardboard*
  • manure/droppings from herbivorous (vegetarian) animals such as horses, rabbits, guinea pigs (or you can just put this straight on the garden)
  • egg shells


Don't compost:
  • nothing but grass clippings, straw and hay (on their own they make bad compost)
  • seeds
  • raw or cooked meat, dairy, eggs
  • cooked food in general**
  • roots of perennial weeds or plants - but particularly of hard-to-eradicate weeds such as dandelion, bindweed or mare's tail (unless you've soaked them for 6 weeks)
  • large branches or logs (unless chopped or chipped)
  • diseased plants or leaves
  • the poo of non-herbivorous animals (e.g. dogs, cats, foxes, humans)

* I don't advise intentionally adding lots of newspaper, paper or card and certainly not books or glossy magazines to your compost heap, because when I went through the compost the previous people in my house had made I found whole books and more or less still readable newspapers in the midst of otherwise well rotted material. I think the information that you can compost these things more means that when you clear out your guinea-pig cage, you can chuck all of the straw, droppings and weed-on newspaper straight into the compost heap and don't have to separate out the newspaper for separate disposal. In fact, cardboard is even part of the no-dig method of gardening. I'm also reassured that I probably can actually use the compost I found in my compost heap, the fact I found whole books and newspapers in it was just them being overly enthusiastic on composting paper.

** As far as we can make out, the ban on cooked food is because it usually contains meat or dairy or is oily and this attracts vermin. If you've got a bit of cooked broccoli with no butter or oil, it's hard to see the problem.

Other tips for composting:

  • Worms help, they eat what you put in and excrete nice, usable compost, so encourage worms if you can. 
  • If you can, situate the compost heap on soil rather than concrete. Micro-organisms from the soil will also speed up the decay and composting process. You can compost on concrete if you want, the people who made compost in my garden before me successfully did. It'll just take longer.
  • Keep your compost heap moist (water if necessary), if it dries out, it will stop composting.
  • If you live in a slug-prone area, don't leave your weeds lying on the soil after weeding, it encourages slugs and snails, put them in the compost heap (I'm not yet sure what the answer is to the fact that my compost heap also attracts slugs and snails).
  • If you produce more grass clippings than your compost heap can cope with, you can use them as a mulch instead.

Monday 15 September 2014

Clearing out a raised bed at the community allotment and learning about gardening tools

The practical part of Saturday's gardening course involved clearing out a raised bed in the community allotment.

The allotment was largely full of mare's tail, so called because it looks a bit like a mare's tail.
Mare's tail
This weed is very hard to get rid of it and we definitely didn't manage to get all the roots out, but we did clear everything that was on the surface and take a lot of root with us. Our teacher said that if we kept cutting the mare's tail off below the surface every time it appeared, eventually it wouldn't come back any more, as plants need light to grow, and if we keep cutting it off below the surface eventually the roots won't have enough energy to come back.


We did most of the work with garden forks. Tips for using these included:

  • use a foot (shod in sensible shoes or boots, not sandals) to help drive the fork into the soil, 
  • gently waggle the fork back and forth with your foot on it when the fork won't go in as far as you want rather than repeatedly stomping on the fork to try and drive it further in,
  • if you can't lift a piece of earth or plant out by inserting your fork in at one location, take it out and keep inserting your fork and waggling all round the thing you're trying to get out; this loosens it and makes it easier to get out,
  • use your fork flat to bash sods of earth so they break up into smaller pieces, and 
  • use your fork like a rake to even out and smooth the soil. 
I'm pleased to report I'd  been doing all of those in my garden already, but only because those were the things I needed to happen to the soil and that seemed the most practical way of getting there with the limited tools I had. It was nice to know I'd arrived at the right solution by trial and error.

But our weed clearing wasn't limited to forks, we also got to try out a couple of implements I've only ever seen on TV before.
The one that looks like an ice pick is actually called a mattock. It looked way too heavy for my delicate back, but seemed pretty effective at getting through tough soil and weeds when I watched other people using it. The trick was not to swing it above waist height and then to let it swing down into the ground, so its weight was do most of the work.
The one that looks like a spade bent to a horrible angle is actually meant to be like that and is called a trenching hoe. It's what people in other countries use for the sort of clearing work we were doing with forks. It was highly effective. I reckon it would have been quicker, but more intensive work than the fork. It was also potentially less versatile, as the fork seemed handier for breaking up sods of earth and raking the surface even.

Our teacher did say though, that however versatile the fork is, it's also worth having a rake, as you just can't get soil nearly as even with a fork as you can with a rake. Look how lovely and even you can get it with a rake:

Sunday 14 September 2014

What sort of soil do you have?

Soil is made up of three main things:
  1. minerals (rocks, sand, clay, chalk etc.)
  2. organic matter (this means the remains of plants and animals - but when this post talks about adding organic matter, it mainly means decayed vegetable matter like compost or the manure of herbivorous animals such as horses, rabbits and guinea pigs)
  3. living organisms that live in it (worms, insects, micro-organisms and even my mortal enemy, the slug).
What sort of soil you have largely depends on the mineral components in the soil. The main types are: clay, sandy, silt, loamy, chalky or lime-rich and peat soils. This last one isn't actually so much based on a mineral as on the organic matter - peat - but all the rest are characterised by the key minerals in them. Practically no one has peat soil in their garden (and presumably if you do, you live near a peat bog and know all about peat), so I'm mainly going to ignore that one.

If you live in the UK, you can find out what your soil's likely to be using this map: http://www.landis.org.uk/soilscapes/

According to the map, my soil is likely to be loamy. I say "likely to be" because my gardening course said soils could vary even across a single garden.

If you don't live in the UK or want to double check whether what the map says makes sense for what you're seeing, here are two questions to help you easily identify if you have a strongly chalky or clay soil followed by some other questions if the answer turns out not to be obviously one of those:

1. Does it have pieces of chalk in it? They're white and you can easily use them to draw a line on other stones (just like the sticks of chalk you can buy for a blackboard). If so, you have chalky soil.

2. Does your soil act a lot like potters clay? It's dense, sticky or slimy and like moist clay, and hard to dig when it's been raining and very hard, cracked and dry clay-like and hard to dig when there's been no rain for ages, particularly when it's been hot. When it's moist, you can shape it and it stays that way, a bit like you can with pure clay. (You can possibly tell I once had a bad experience trying to help a friend dig his clay soil garden, it was much harder than I was used to).

Once you've got past those simple questions which show if your soil has a lot of obvious chalk or clay, things get a little more complicated. The first thing to do is feel your soil between your fingers.

How does the soil feel?

sticky and heavy (like moist clay) clay soil
slimy clay soil
gritty and light (a bit like sand on a beach, but often not sandy in colour) sandy soil
friable = easily crumbled loamy soil (or in my experience, can also be sandy, as sandy soil sometimes seems as friable as it does gritty)
slightly soapy, slippery silt soil (pure silt soils are rare in gardens)

If the answer is obvious, you can stop there, if not, ask:

What does the soil look like in the jam jar test?

Put about a tablespoon or two of soil in the bottom of an empty jam jar (no need to use a tablespoon, that's just a guide to the rough amount you're aiming for). Fill it up with water, give it a good shake, then leave it for an hour. After an hour, the organic parts of the soil should be floating on the surface. The question is what's happened to the rest:

white bits floating in the water chalky soil
water might look a bit murky, but thin and the soil has sunk to the bottom; if you try and get the wet soil to stick together it either won't stick together at all or has difficulty sticking together, it feels a bit gritty sandy soil
the water either has bits of clay floating in it or is no longer transparent, but has formed an emulsion with the clay or both, any soil at the bottom doesn't feel gritty and can be clumped together into a ball that stays together quite well clay soil
like clay, but what's left at the bottom of the jar feels gritty loamy soil, which is a mixture of clay, sand and silt

Soil from my garden  (loamy according to Soilscape) one hour after I shook the jar. No sign of chalk and not seeing much sign of clay.
Soil from the garden of some friends in Guildford. Soilscape, says it's loamy and clayey, but actually unfortunately it doesn't look very different from mine in the jar test (especially after you factor in different lighting and whether I'd left it as long). Not sure if that's because mine's also a loamy soil and as such also contains some clay or if the slight difference in the water is significant and shows theirs has more clay. Theirs definitely also contains sand or similar particulate matter, I found traces of it when I was cleaning the jar out, so this seems to back up Soilscape's assertion that their soil is loamy as well as clayey.

What happens if you try to roll a sausage out of your soil when it's moist?


rolls into a completely uncracked sausage, shiny when rubbed high clay content
rolls into a completely uncracked sausage and is a bit sticky, but not shiny when rubbedclay soil, but lower clay content
won't roll into a sausage at allno clay content
rolls into a cracked sausage, not sticky I couldn't find a definitive answer on that. Possibly loamy soil. As far as I can make out, it's not a soil you'd refer to as a clay soil, but it may have some clay content.


Soil from my garden rolled up into the best ball I could manage when wet (I hadn't found the sausage test when I did this). This is probably indicative of the 20% clay content in loam, but it's not a dominant element because it's not in the least sticky.

Me finding particles in my soil - could be sand or silt or both, but definitely not pure clay
This all seems to back up Soilscape's view that I have a loamy soil.

What colour is the soil?


very pale/greyish, chalky coloured soilchalk (not being this colour doesn't mean no chalk)
a bit orange or reddishclay soil with a high clay content can look reddish or orangey (not being this colour doesn't mean no clay)
lighter coloured soilprobably contains less organic matter
darker coloured soilprobably contains more organic matter
My soil (not dark brown, but definitely not chalky or greyish either)
Well-rotted organic matter from the bottom of my compost heap

Clay soil

The good news: clay soils are very rich in nutrients. They are usually pH neutral (neither acidic nor alkaline), which means that their pH is 7. Most plants prefer pH 6.5-7, so they're good for most plants.

The bad news: they can get very cloddy and tend to be hard to dig whether they're wet or dry. They also hold a lot of water, which is sort of good because they need watering less often, but bad because they tend to get water-logged, which plants don't like. They also take longer to warm up in spring, which means effectively spring comes later for your plants. Also, they're easily damaged when water-logged, so don't dig them or walk on them till they've dried up a bit (although completely dry won't work either, as they can bake rock hard).

What to do to help: add plenty of organic matter. This will break the clay down into crumbs, which will make its nutrients more available to plants and also make the soil warmer, easier to work and less prone to compaction. Also, dig them in autumn or early winter when they're less wet to avoid damaging them. If you leave them in narrow ridges after digging, this could help drainage and encourage frost to help break them down instead of you digging. Adopting a no-dig regime may be better for the soil (and a lot less work for you) – I'll be talking more about no-dig systems in later posts, as my bad back means no-dig' could be really handy for me.

See here for more information and advice from the RHS.

Sandy soil

The good news: these are easy to dig and cultivate and generally to work. They warm up quickly, which effectively means spring comes earlier for your plants. They also tend not to get water-logged because they're free draining, so plants that like it dry (don't like soggy roots) will thrive. According to this article in the Telegraph, you may well be less troubled by slugs and snails than people with less freely draining soils.

The bad news: because they're so free draining, they lose water easily and need a lot of watering (hard work and/or bad for the environment). They're also naturally low on nutrients unless they contain plenty of organic matter. They can also be very acidic. Acidic soils are pH 6.9 and below, and most plants prefer pH 6.5-7, so lower than 6.5 will not suit quite a lot of plants.

What you can do to help: add plenty of organic matter, this will bind the loose sand into more fertile crumbs, stopping it from draining quite so quickly. It also adds nutrients and makes the nutrients more easily available to plants. Adding fertilisers can help provide the nutrients it's missing. Choose plants that can cope without much water and add a mulch to the top to preserve as much water as you can. Also, it may pay to pH test your soil, and stick to plants that do well in its level of acidity. I'm going to write more about soil pH in another post.

See here for more information and advice from the RHS.

Silt soil

The good news: these are fertile, fairly well drained and hold more moisture than sandy soil.

The bad news: these soils are made up of fine particles (even finer than sand) and can be easily compacted by treading and use of garden machinery. They are prone to washing away and to wind erosion if left exposed to the elements without plant cover.

What to do to help: add plenty of organic matter. This will bind the silt particles into more stable crumbs.

Loams

The good news: lucky you, these are considered to have a perfect balance of all soil particle types, they're 40% sand. 40% silt and 20% clay. This means they're fertile, well drained and easily worked.

The bad news: slugs seem very happy in loamy soil (they're certainly present in large numbers in my garden and this article in the Telegraph seems to imply that slugs are happy in soils that can retain moisture well). You may well have a lot of them.

What you can do to help: even though this soil type is great, the advice is that you should still regularly add organic matter. I assume this is to replenish nutrients your plants are using up. Also, according to the descriptions of different types of loamy soils on Soilscape's map, not all loamy soils are high in nutrients.

Chalky soil

The good news: some of Britain's most productive agricultural soils are chalky. They warm up quickly in spring and brassicas (plants including cabbage, cauliflower and broccoli) are less likely to get clubfoot. Light chalky soils rarely flood because they're free draining.

The bad news: because chalk soils are alkaline (i.e. they have a pH of 7.1 or more – the higher the pH the more alkaline it is) they won't support lime-hating plants or ericaceous plants that need acid soil conditions, and you can't acidify a chalk soil. A lot of chalky soils are shallow, i.e. if you dig down through the soil, you'll get through it and hit the layer of rock below quite quickly. They're also free-draining (i.e. need watering regularly) and low in nutrients, but where clay is present, nutrient levels might be higher and they might be able to retain more water. Organic matter often breaks down quickly in chalky soils.

What to do to help: Choose plants that will thrive in alkaline conditions (also known as calcioles or lime-loving plants). If you want to plant acid-loving plants or lime-hating plants (also known as calcifuges), plant them in a pot or a raised bed that you've filled with a suitable soil you've bought (with a raised bed if you just use acidic compost it will eventually sink away into your soil, so actually buy acidic soil rather than compost. That can't happen with a pot, so acidic compost should be fine). Add organic matter very frequently.

See the RHS's website for more information and tips on chalky soil.

Peat soil

The good news: they've usually very fertile and contain a high proportion of organic matter (peat). It warms up quickly in the spring. It's great for plant growth if fertiliser is added.

The bad news: highly water retentive, so may require drainage if the water table is neat the surface. Fewer nutrients because because the soil’s acidic nature inhibits decomposition or organic matter (which is a reason there's so much of it).

What to do to help: add fertiliser. Unlike the other soils, presumably adding organic matter doesn't help because it's already full of it.

Saturday 13 September 2014

Vegetable growing course at Carshalton Community Allotment - week 1

I attended my first session of a 6 week vegetable growing course (2 hours every Saturday) at Carshalton Community Allotment today. This week's topic was soil preparation. I thought I knew a fair amount about gardening, but I learnt so much I thought this was worthy of several blog posts. I'll be adding more posts as I go along. The picture below is of keyhole gardening. It's one of the ways they're growing plants at the allotment.
Keyhole gardening
They're growing pak choi (aka Chinese cabbage). What makes it keyhole gardening is the hole at the top between the planks of wood.
Watering a keyhole garden
That's where you add the water and compost and it feeds its way down into the rest of the soil and the plants. The cardboard is to help the plants stay in place, suppress weeds and help it retain water. The plastic bottles on the tops of the sticks are simply to stop anyone getting poked (in the eye or anywhere else) by one of the sticks. They encourage children to participate, so they're keen on safety measures.

The keyhole gardening wasn't even an official part of our course (or at least I don't think it was). The course leader just showed it to us on our way out.

Monday 8 September 2014

Harvesting for an impromptu lamb casserole

I roasted a shoulder of lamb yesterday when my parents came to visit and I hadn't really thought about how much of it was going to be left over afterwards. I'm not keen on cold lamb, so I decided to make a casserole. My complete failure to anticipate all my leftover lamb meant I didn't have much in the way of suitable vegetables in, so I decided to raid the garden for veg.
The things that looked like they might be big enough to be worth eating were a swede (no photo because the file got corrupted on my camera), a beetroot
and a carrot.
The carrot was actually a lot bigger than I expected at around 15 cm long. I managed to salvage the thumbnails of it and the beetroot and swede from the corrupted photos:


The beetroot, as with the previous ones, though, had had a chunk eaten out of it. I'm clearly not the only one in the garden who likes a bit of beetroot.

Anyhow, the casserole ended up a bit of an odd colour because of the beetroot, but it tasted pretty good, so here's the recipe:

Lamb casserole
Leftover cold lamb and bone from one shoulder of roast lamb
2 tbsp olive oil
3 sprigs of fresh rosemary (or 3 tsp of dried rosemary)
1-2 tbsp plain flour
1 chopped onion (optionally frozen)
about 750 g of potatoes, washed and chopped into bite-sized chunks, but not peeled
1 small beetroot, peeled and chopped small (not sure how important this was to the flavour, the colour would have been better without it)
1 carrot, peeled and sliced
1 very small swede (about 100 g), peeled and chopped
1 400 g can of cannellini beans
1 360 g carton of chopped tomatoes
half a broccoli, chopped into bite size pieces (you can put the stalk in too if you cut the tough outside off, I cut the tender inside bits of the stalk up pretty small so my husband wouldn't notice he was eating it)
salt and pepper (to taste)
1 tsp turmeric (to try and hide the strange colour the beetroot turned it, I'm not sure it made a significant contribution to the taste)
1 tsp paprika (also to try and disguise the beetroot colour, I originally wanted to put smoked paprika in for the smoky flavour, but I couldn't find it).

1. Remove the remaining cold meat from the bone, then remove any fat or obvious gristle from the meat.
2. Separate/bend the bone at the joint so it fits easily into a large saucepan, then add to a saucepan with any leftover fat and gristle. Cover with water and bring to the boil for at least 10 minutes (20-30 mins would be better).
3. Chop the leftover meat into large, bite-sized pieces, removing any fat or gristle you notice and adding it to the stock (the water with the bone in it).
4. Pour olive oil into a metal casserole dish and heat,
5. Add the onions to the casserole dish and stir till soft.
6. Add the chunks of cold lamb and rosemary and stir on a medium/high heat until the outsides of the meat have browned/crisped up. Turn the heat back down.
7. Add the flour and stir.
8. Add the potatoes.
9. Use a colander or sieve to drain the lamb stock into the casserole dish until it just covers the potatoes and lamb (you can always freeze any leftover stock in an ice cube tray). Stir and simmer for about 10 minutes.
10. Add the beetroot, carrot, swede, cannellini beans and tomatoes. Stir and simmer for about 5 minutes.
11. Add broccoli, salt and pepper, turmeric and paprika and simmer until the broccoli is just cooked (probably about 8 minutes).
12. Serve in a bowl with a spoon.

Sunday 7 September 2014

Companion planting or a gift of chrysanthemums

My parents came to visit today and brought me some chrysanthemums.

Chrysanthemum indicum
The ones they brought me are called Chrysanthemum indicum. They flower all the way through until November, so I wanted to put them out in the front garden to refresh my display, which has become a bit straggly since I planted it in June. One of the reasons the display is not a thing of beauty right now is that slugs and snails have eaten all of the leaves off most of my marigolds and most of the leaves off the rest (or at least that's where I'm assuming the leaves have gone, I haven't yet caught anything chomping at them yet). So, before I planted them in an area rife with slugs I wanted to check how much of a delicacy my slimy garden foe considers them.

We had no luck finding that out, although it also gradually dawned on me that none of my garden is safe from slugs anyhow, so it's really pretty much irrelevant. If they can't survive slugs, they won't survive my garden.

What we did discover though, is that they're considered good companion plants for vegetables because they repel insects and other pests from surrounding plants and their crushed, dried flowers can be used as a pesticide. Wikipedia says this is because chrysanths contain pyrethrums and these are thought to repel aphids, bed bugs, leafhoppers, spider mites, harlequin bugs, ticks, pickleworms, and imported cabbage worms (whatever those are). This is good news on two fronts, firstly I desperately need anything that can repel pests in my garden and secondly because I want my vegetable garden to be as pretty as possible, so having a reason to plant flowers is good.

I've planted two of the chrysanthemums in my window box of nasturtiums. They're pretty much covered in black aphids and the marigolds I planted between them have been devastated, presumably at the mouths of slugs. We'll see whether the chrysanthemums can hold their own. I've also planted four at the front of the garden where the marigolds have been stripped bare of leaves. If they can survive the slug and snail onslaught I'll dry the flowers I deadhead and crush them to powder to use as an organic pesticide. It would be good if it works. I'm still having real difficulty keeping my veg safe from insects (the rocket is covered in something that looks like eggs) and I'd really like to have an organic method of killing pests, as I don't want to go accidentally killing bees with non-organic pesticides (there are reports on the Internet that neonicotinoids may well be responsible killing large numbers of bees, whereas chrysanthemums and are entirely natural, give or take selective breeding, and are therefore highly unlikely to be responsible for colony collapse disorder). Much as I want to successfully grow veg in my back garden, it doesn't seem worth risking the lives of bees and other beneficial insects for it.

Jack and the beanstalk it ain't...

...but my runner bean plant is leaps and bounds ahead of anything I thought possible back when it got savaged by slugs and lost all its leaves. It now has flowers and has wrapped itself around a cane. If London's Indian summer continues I might even see a couple of beans.
My runner bean
It's definitely still tiny compared to what it could have been if I'd been able to plant it earlier in the season. This is one of the runner bean plants I saw when I visited the allotments for my vegetable growing course the following Saturday:
Someone else's runner bean at the allotments