This week's lesson was on seeds, seedling and planting them. It turns out that seeds contain the makings of a whole plant inside them, just waiting to get out:

All they need to germinate is warmth and water. That means you can even germinate them in an airing cupboard. But once they've germinated, they need to come out of the airing cupboard pretty quickly, as they start having a whole host more needs. At that point, if you leave them in the airing cupboard they'll go all leggy because at this point they need light (and if you leave them in the dark, they'll grow overly tall and thin trying to find it). They also need nutrients and carbon dioxide (not that there's any lack of that in your average airing cupboard). Basically, you now need to put them somewhere light, still warm enough for them and provide them with water, and in most cases also soil or compost. It's generally pretty sensible to have provided them with these things (with the possible exception of light) while trying to germinate them too.
Here's us doing some practical work and planting some seeds:
These trays are suitable for little seeds - like lettuce seeds (any seed that's smaller than a few millimetres). Bigger seeds - like beans - would need to go in deeper pots. We put a piece of newspaper in the bottom as it stops any of the compost falling out the holes in the bottom.
Then we filled the seed trays with compost and patted them down so it was nice and firm.
Step 3: read the seed packet, see how deep the seed needs to be and make a trench that deep (with your finger or a pen or something similar). Scatter in the seeds - we were aiming for about twenty in total in each tray, divided over two rows. Some may not germinate, so you aim for a few more than you need, but there's not point in putting 50 in (unless you live with a truly huge group of people) as you just won't need that many lettuces.
We then covered over the trenches by knocking compost back over them.
Step 4: make a label. If you use plastic labels and write in pencil like we did, you can rub the words off with a cloth at a later date and use them again next year. The label should include both the name of the plant and the date.
Finally, and very importantly, water them thoroughly (the two things seeds need to germinate are water and warmth), then put them somewhere warm and wait for them to grow.
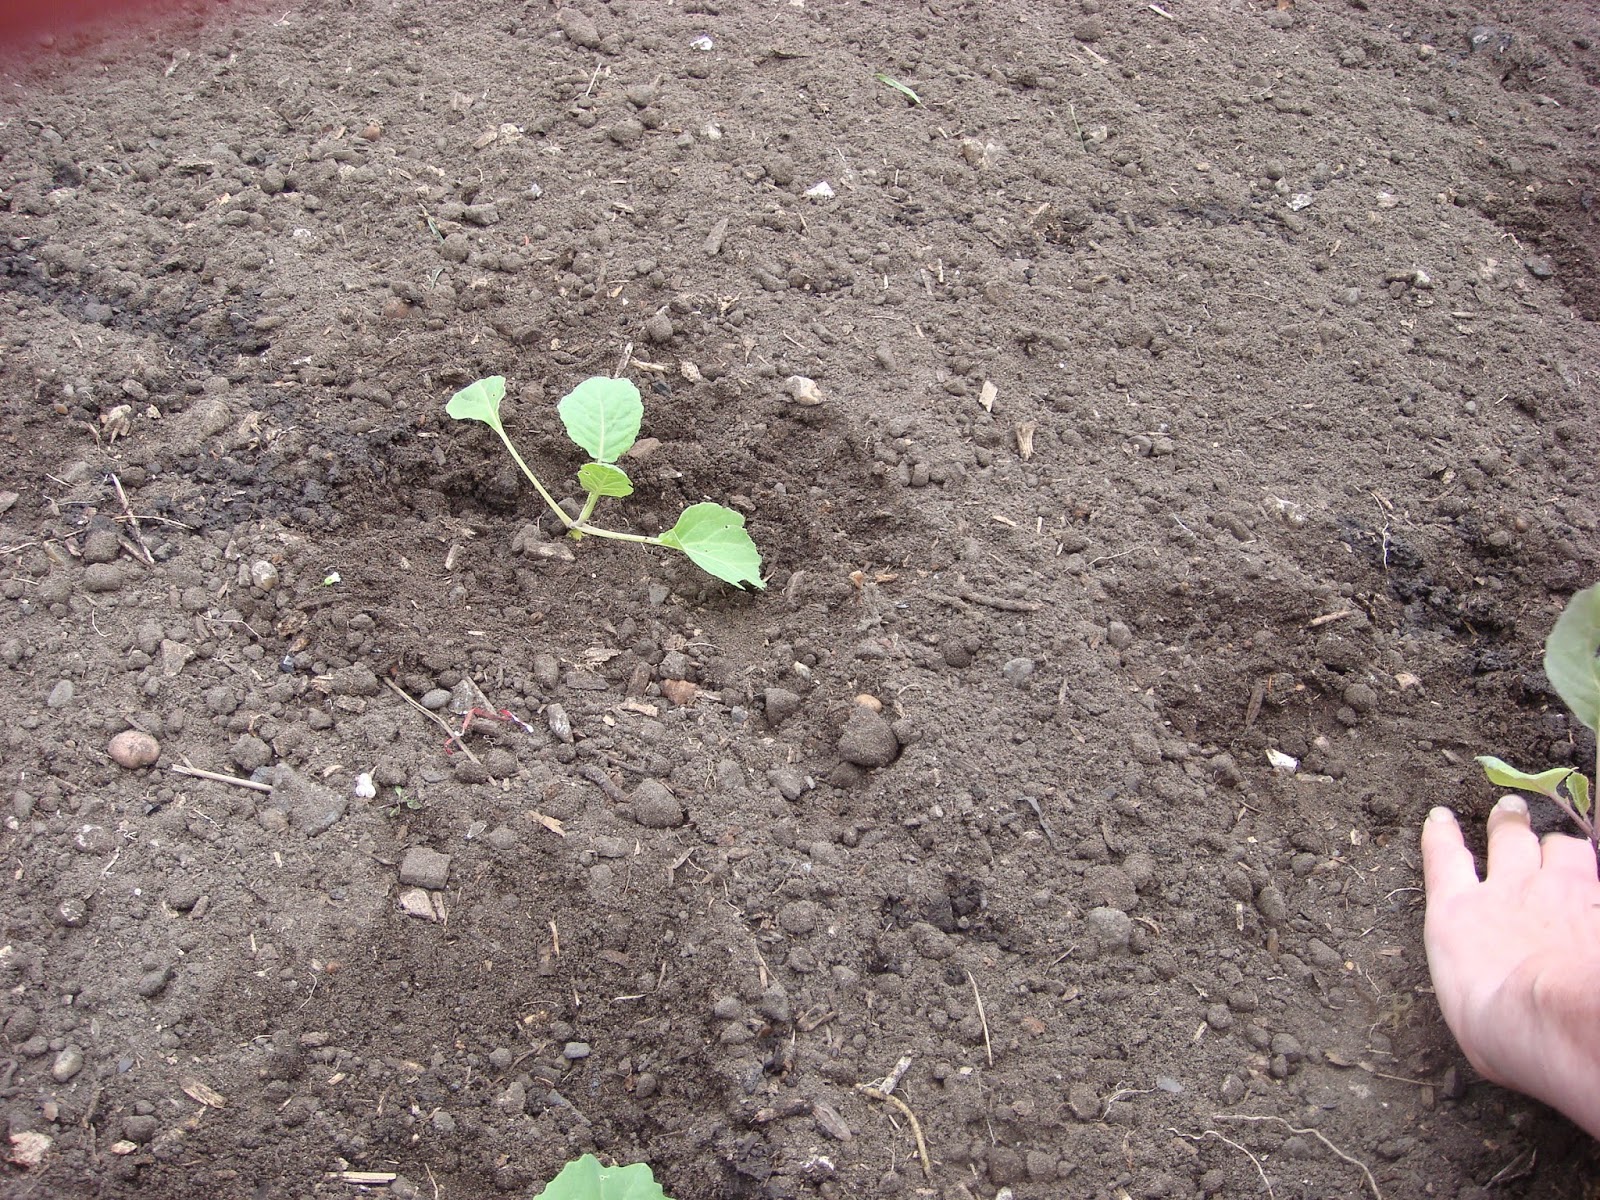
We also planted out some seedlings that had already previously been grown in seed trays.
First you gently extract a few from the tray, then gently pull them apart so that the roots separate from each other and you have individual seedlings. You should be fairly gentle with them, but you're bound to break some of the roots off. This doesn't matter, the seedlings can cope.
Dig holes at the correct distance apart. It'll tell you how far on the packet. These were cabbages and we were putting them in at 45 cm apart. Unlike with planting seeds, when you plant seedlings you're supposed to water the hole first. It gives their roots a better chance of taking to their new home.
You can (and even should) plant brassicas like cabbages with a fair amount of their stems buried under the ground, but with all their leaves and their stalks above the ground. Push the soil in around the plant and firm it down with your hands. It should be pretty firm, If you pull on the plant by one of its leaves, the plant should remain firmly embedded in the ground.
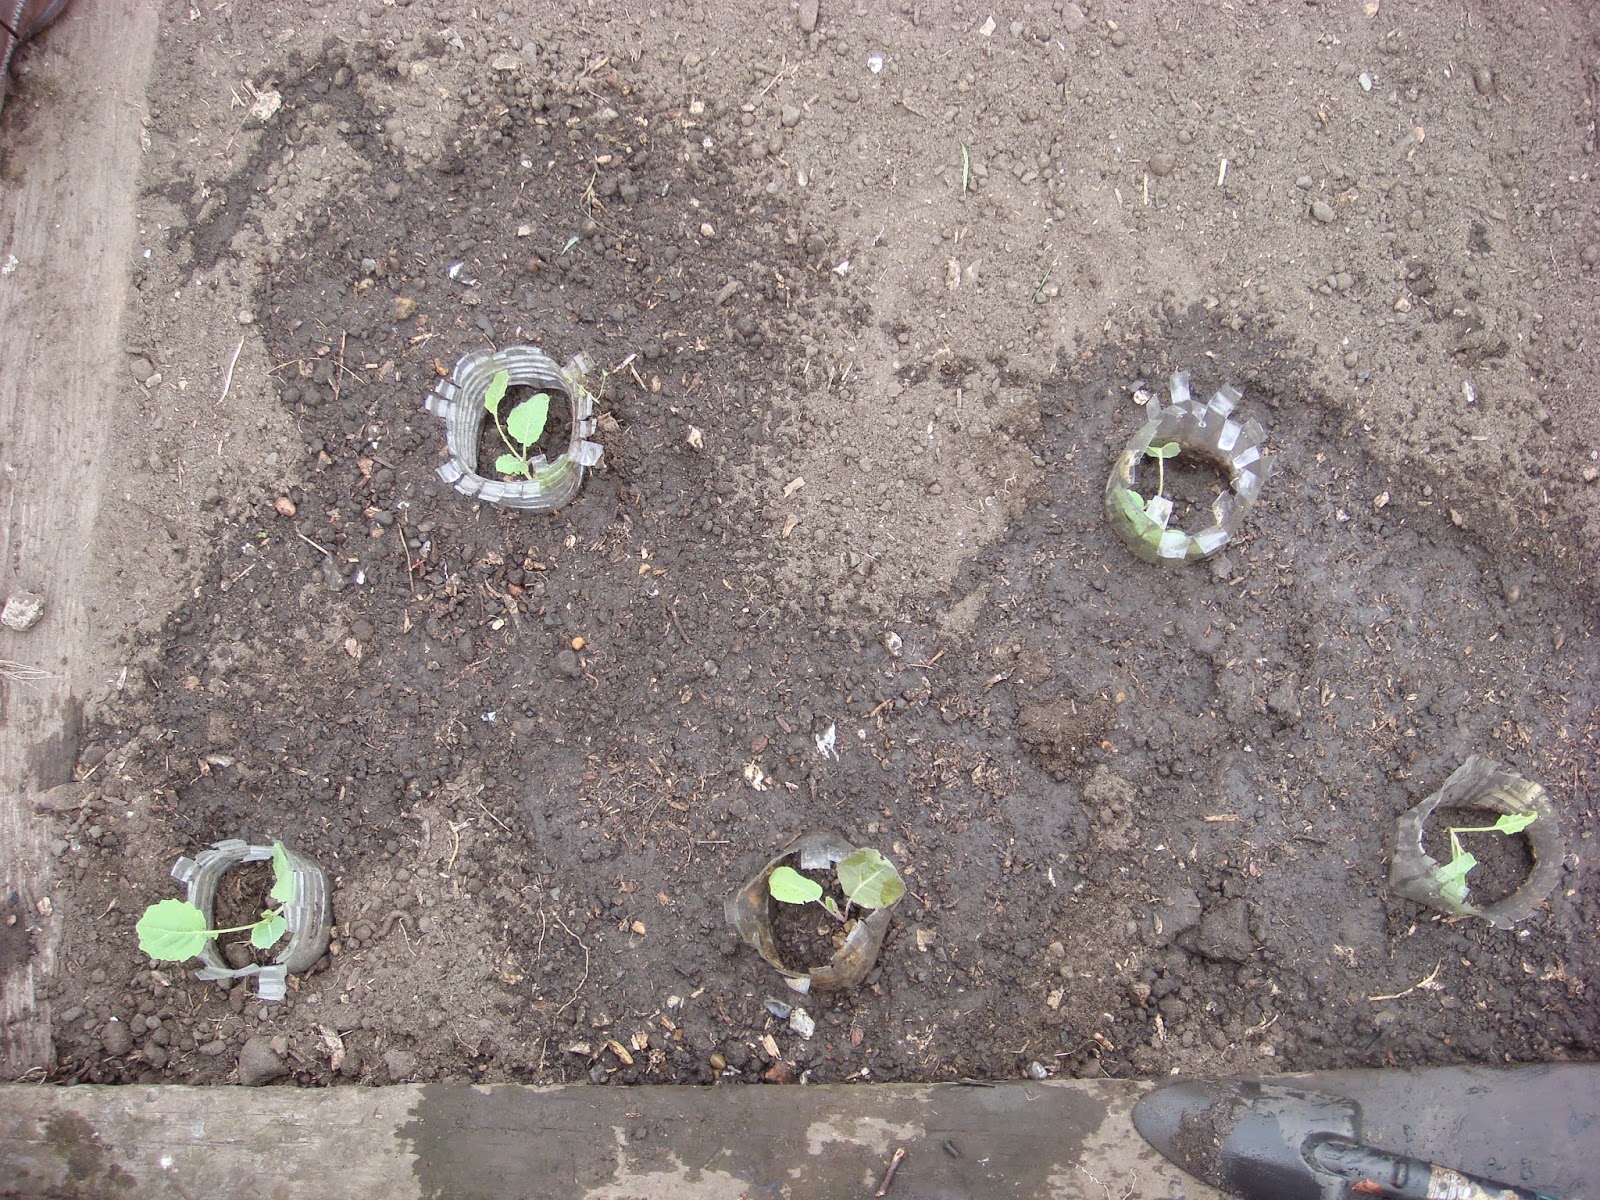
We then added these cut out bits of bottles. They give the seedling some protection against slugs.
The next step: water them again.
Because brassicas are greedy feeders (they need a lot of nutrients), our teacher, Simon, added some hop manure pellets. You'd probably need to add another form of fertiliser, as he said these weren't commercially available any more. Our cabbages got the pellets because because that was what he'd happened to find in the shed.


No comments:
Post a Comment