Sunday, 12 October 2014

Fertiliser - you only get back what you put in

We all know that plants need nutrients to grow. If you're like me pre-gardening course, you just stick them in the soil and assume that that has everything they need in it. After all, that's all they get in the wild. But actually it turns out that there's more to it than that. We don't grow plants – either on farms or in gardens – like they grow in the wild (not even organic farms). In the wild, no one goes round clearing up all the dead plant life that ends up on the soil - or for that matter the animal excrement or dead animals. Sure, some things eat some of these things, but actually they themselves tend to produce excretions that end up back in the soil.

Modern human life avoids this. We clear up dead plants and, if the garden's lucky, put them in a compost heap and return them to the garden. If it's not so lucky we send them off to the council's green waste collection or just put them in the bin, and after we've up eaten plants we don't return the waste products we create from them to the soil, we transport them away via the sewer system.

Now, don't get me wrong, I'm not suggesting turning you garden into your toilet. For health and disease reasons, that would be a truly bad idea. You don't want the excrement of anything that's not a herbivore on your garden (so horse manure = good, human "manure" or dog or fox mess = health risk). But this does mean that we're taking a lot of nutrients away from the soil in our gardens and farmland that never leave wild areas (because we take away the plants that have grown there). This leaves the soil depleted and less able to support plants. We need to add it back in the form of compost or fertiliser.

The main nutrients plants need are nitrogen (good for leaves and shoots), phosphorous (good for roots) and potassium (good for flowers and fruits) N, P and K on the periodic table of elements). So non-organic farms make sure they add these to the soil. They do it by deriving these from petrochemicals. The problem with this is that although these are the main nutrients plants need, they're not the only ones that they need, and when you use NPK fertilisers made of petrochemicals, these are the only chemicals the soil gets and therefore the plants and ultimately, if you're eating the plant, you get. This gets worse year after year, as the levels of other elements the soil originally contained get further depleted. Also, plants need a wide range of nutrients to help them stay healthy. Here's a page with a really useful picture on it that shows you how to diagnose missing nutrients based on what's wrong with you plant - some things that look like disease actually turn out to be a lack of nutrients.

Organic fertilisers come from things that were originally living organisms and contain more than pure nitrogen, phosphorous or potassium (although not all of them are high in all of those). Here are some organic fertiliser options:
Bone meal
The nitrogen-phosphorus-potassium ratio of bone meal is generally 4-12-0, though some steamed bone meals have a ratio of 1-13-0. Bone meal is also an excellent source of calcium, but does not provide enough nitrogen to be beneficial to plants. Research suggests plants can only get phosphorus from bone meal if the soil pH is below 7.0 (acidic soil).*
Seaweed
Helps to bind soil crumbs together, and it contains all soil nutrients (0.3% N, 0.1% P, 1.0% K, plus a full range of trace elements)*.
Organic chicken manure
According to the RHS website, pelleted poultry manure is a good source of ntirogen and generally contains 4% nitrogen (as ammoniacal nitrogen), 2% phosphorous (as phosphorus pentxide) and 1% potassium (as potassium oxide).Most poultry manure is in the range of pH 6.5-8.0, being neutral to moderately alkaline, so unsuitable for lime-hating plants. According to this website, it also contains a range of trace elements, with amounts varying depending on the diet of the poultry and how they're kept.
Manure
I assume this is horse manure. According to this website, horse manure is only about half as rich as chicken manure, but richer in nitrogen than cow manure. Horse manure is considered "hot", which means it should be composted before it's put on the soil so it doesn't burn the plants it comes into contact with. Also, horse manure often contains a lot of weed seeds, which means it's a good idea to compost it using a hot composting method or to buy it already hot composted.
Green manure - mustard

Green manure - buckwheat

Green manure - red clover
Green manure - alfalfa


Green manures are plants you grow between other crops (often over winter) and then dig into the soil before planting your next crop. They suppress weeds while they're growing and make nutrients in the soil more available to other plants. Many are leguminous and fix nitrogen in the soil. Some also acidify soil. Which nutrients or effects you get depends on which green manure you pick.
Comfrey
Because comfrey has deep roots, it sucks nutrients from deep out of the soil. Comfrey fertiliser makes these available to plants with roots that don't go so deep. My next post will tell you how to make your own comfrey fertiliser.

* Information from Wikipedia on 12 October 2014.

Saturday, 11 October 2014

12 organic ways to deal with slugs and snails by level of violence


When choosing your organic slug and snail defences, the big question you need to ask yourself as an organic gardener is how do you feel about slugs and snails? There are a spectrum of options depending on your attitude to our slimy friends:

A. Slugs and snails are my nemesis. Death to molluscs!

1. Stamp on them
You're most likely to find them when it's been raining or at night (for instance with a head torch). The method's as simple as it sounds. Find them and stamp on them. You can just leave them crushed on the ground. Something - I suspect birds or hedgehogs - will come along and eat them later.

2. Drown them
Wear gardening gloves (slugs feel as disgusting as they look). Fill a bucket (or similar container) with water and a bit of washing up liquid. Go round the garden gathering every slug or snail you see and popping them into the bucket (good times are after it's been raining or after dark with a torch). Job done.

3. The Black Plastic Bag Method
Place a black bin liner on the ground between your tender plants. Put two lettuces that are too old (or too pest-eaten) to eat in the bag, add two teacups of breakfast bran and a full cup of beer (ideally bitter). Leave over night with the top open. Check for slugs in the morning and either drown them or take them a very long way away and release them (be warned, slugs and snails seem to have quite a good sense of geography and may succeed in coming back to your garden unless you take them a really long way away - no one seems to be completely certain how far - I'm tempted to look for empirical evidence with snails and nail varnish marks).

4. The grapefruit method
Halve a grapefruit and remove the flesh (I suggest by eating it for breakfast).Put the rind on the ground in the garden near your tender plants, hollowed-out side down. Leave it out overnight. Next morning, check underneath for slugs and snails and dispose of them by one of the options described in the black plastic bag method.

B. I want them dead, but I don't want to do it myself, killing them directly makes me feel guilty.

5. Beer traps
Put some beer (or 2 cups of warm water, 2 tablespoons of flour, 1 teaspoon of sugar and ½ teaspoon of yeast) in a smooth-edged container in the ground. A plastic cup or yoghurt pot will do, but for a longer lasting slug trap that can withstand both rain and evaporation, try turning a plastic bottle into one of these:

You then need to bury them on their side at an angle in the soil so the slugs can crawl through the bottle neck into the beer at the bottom. The problem with these is that only slugs and smaller snails can get in. You need a bottle with much bigger neck for full-size snails to be able to get in and drown too. Apparently it's not actually a problem leaving rotting slugs and snails in them. My slug traps probably stopped working because the beer got watered down by rain and didn't smell strongly enough any more, not because of the dead molluscs floating in them. When you do finally empty them, you can just tip the slugs and snails out onto your grass or soil for birds to eat.

6. Nematodes
Buy these from a garden shop or online shop. Apply early in the growing season (but after the soil is above 5°C (40°F)). Follow the instructions on the pack.

7. Encourage predators
It's not just the French who eat snails. Others who consider snails a suitable snack (and are equally happy to munch on slugs) include ground and rove beetles, centipedes (remember them on the list of friends in the garden pests post? now you know why), frogs, toads, slow worms, hedgehogs and many species of bird.

7a. Frogs and toads
Keep a pond (without goldfish).

7b. Slow worms
Leave areas of long grass.

7c. Hedgehogs
Put dog food out at night (not bread and milk, that's bad for them) and provide them with a waterproof box to live in. The box should be about 45 cm (18 inches) long and 30 cm (12 inches) deep. Fill it with straw to make it nice and snug, then hide it by covering it with leaves.

7d. Ground and rover beetles (the trench method)
Dig a trench about 15 cm (6 inches) deep and 7.5 cm (3 inches across). Line it with pebbles and Perspex edges. Beetles will fall into the trench and can hide under the pebbles, which will protect them from birds. When a slug falls in, the beetle will eat it for dinner.

C. Slugs have every right to be here, I just want to try and keep them away from my plants as much as possible without causing death, maiming or other violence to molluscs

8. Keep your soil slug-unfriendly
Create a fine tilth on the top of the soil (fine, crumbly soil created by digging and raking). Also, if you only object to killing sentient slugs and snails, rake your soil in the winter, as this will expose slug eggs to frost damage.

9. Tidy up any dead plants or weeds or fallen leaves
Slugs eat decaying vegetation, so this is a source of food for them and will encourage them. Remove it (and put it in your compost heap).

10. Vermiculite
Vermiculite is a type of mineral which swells up when in contact with water. It also moves about in soil, which slugs apparently dislike. Add it to compost and put it around plants, especially those which like water. This puts slugs off. It is allegedly 90% effective.

11. Copper
Put copper slug rings round your plants or copper tape around your pots or raised beds. Make absolutely certain there's no gap between the slug ring and the soil, not even a tiny one, baby slugs and snails are really tiny and will slip through tiny gaps. Also, make sure there aren't any bridges over the slug ring or tape that would allow slugs or snails to climb over it (e.g. leaves hanging over the edge). Also make sure no slugs or snails or their eggs are already inside. Slugs and snails may also find ways to lower themselves in from overhanging plants, so none of those - they're surprisingly able to find their way from A to B, but if the only option is to crawl across copper, they won't go there.

12. Other barrier methods
You can also make barriers out of baked egg shells or coffee grounds. I'm pretty sure I once watched an Alan Titchmarsh programme where he proved these all ineffective, but they still might be better than nothing.

A quick note on metaldehyde (conventional, non-organic slug pellets)

The most effective way that I know of to deal with slugs is not to be organic. Slug pellets containing metaldehyde kill slugs and snails quickly and efficiently. There are a few problems with it though. Firstly, it's a poison and is also poisonous to pets and children (or for that matter adults or other garden wildlife). There seems to be some disagreement as to whether it bioaccumulates (builds up in an organism because it's absorbed faster than the substance is lost). Our teacher on the gardening course says it does and gathers in animals higher up the food chain that have eaten poisoned slugs and snails. A quick search of the Internet says it doesn't. Either way, it's not organic, so if you want to garden organically, you should avoid it.

Tuesday, 7 October 2014

Garden pests and how to stop them

This week the gardening course went through the various insects and similar life-forms you'll find in the garden and sorted them into lists of friend or foe. The rough rule of thumb we were taught was: fast-moving = friend, slow-moving = foe. So, here's the (completely non-exhaustive) list:

Friends
ground beetles
worms
centipedes
anthrocids
hover flies
lacewings
ladybirds
bees

Foes
caterpillars (and therefore the butterflies that lay them - especially the cabbage white)
snails
slugs
millipedes
aphids (includes black fly and green fly)

Neutral
wasps
earwigs
birds (they pick off insects, but eat your fruit, and pigeons pick at cabbages)

And here are some things you can do to protect your fruit and veg:

1. Encourage/try to avoid killing friendly insects or their larval forms
Many of them eat aphids or other enemy insects.

2. Use netting
7 mm netting will stop butterflies from getting to your veg. I'm pretty sure the netting I used is bigger than that but worked anyhow, but apparently 7 mm is small enough that they definitely can't squeeze their way through, however good your cabbages smell. Here's a cleverer way of putting it over your veg than I came up with (as seen at the allotments):

Netting's also good for keeping birds off your fruit - although I don't always think that's so much of a problem, at least not in London, but maybe it depends on the fruit. At any rate, birds never showed any interest in my raspberries. You can do it just like the picture above - bamboo canes with bottles on the top - or you can build a fruit cage like the picture below. The key thing is don't forget to leave one side of the netting easy to remove so you can get to the plant to pick the fruit.
Here's some insect netting that's sufficiently fine it even stops carrot flies. And better still, unless you are leaving your carrots in for a second year to go to seed they don't actually need to be pollenated, so the fact this also keeps pollinating insects out isn't a problem for carrots, so you cn leave it on as long as you like.


3. Agricultural fleece
This is finer than netting and will also keep your soil and plants a bit warmer (you just roll it out over the top of them), and it's so dense that no insects (or at least not any I know of) can get through. It does let light through though, so your plant can grow under it. The problem is that because no insects can get through, none can get to the plants to pollinate them, so it needs to come off at the point anything needs pollinating. Also, it's probably a bit pricey to just put over everything (although it is reusable).

4. Insect sprays
Obviously it's possible to buy commercially available insect sprays, however, the non-organic ones are not very environmentally friendly and anyway, it's also possible to make your own (which are pretty environmentally friendly). Here are the ones they recommended on the course:

a. Garlic and pepper spray
Kills: ants, caterpillars, cabbage worms
To make: crush garlic, chop/grind chilli peppers. Add boiling water. Allow to cool. Add two tablespoons of pure soap (this seems to mean soap without any added ingredients, presumably either pure liquid soap or pure soap flakes is the easiest sort to use). I assume this recipe is for a spray bottle full, but it doesn't say.

b. Onion spray
Kills: aphids, red spider mites
To make: chop up one large unpeeled onion. Place in a blender with one litre of water and blend on a slow speed to a milky consistency.

c. Soap spray
Kills: most pests
To make: dissolve 225 grams of eco-laundry soap in 9 litres of water. Spray on plants and allow to dry. Hose it down with clean water the next day.


5. Companion planting
The course gave me a list, which I might add to the blog another time, but I've kind of gone off the idea of companion planting after I planted chrysanthemums (which are supposed to deter aphids) next to nasturtiums (which aphids love and which some theories of companion planting say you can plant near other plants that aphids love as a kind of sacrificial plant to draw all the aphids) and this happened:
Nasturtiums absolutely covered in aphids (black fly)
 And worse still, this happened:
Chrysanthemum with aphids (black fly)
My companion plant, the chrysanthemum, which was supposed to deter aphids from all the surrounding plants got aphids itself.

I'll write more about ways of dealing with slugs another time, as it deserves a whole post in its own right.

Sunday, 28 September 2014

Runner beans, black fly and EU law

My poor old runner bean plants. They've survived through near fatal slug and snail attacks thanks to my use of a slug ring. They then revelled in the opportunity provided by our unexpected and balmy Indian summer to grow to a fairly decent size (several feet tall), only to be attacked by hordes of black fly (a type of aphids that are black in colour).

Now, the standard gardening remedy to aphids (whatever their colour) is to mix a squirt or two of washing up liquid up in a spray bottle full of water (no more than about a teaspoon a litre) and spray the aphids with it. This suffocates the little blighters. I'm a bit hazy on the scientific details, but basically post-spraying, the aphids die. If you miss any, those aphids survive, so you need to be thorough and make sure you've done all the stems and undersides of leaves. Also the spray does nothing to prevent new aphids from finding your plant and settling on it to breed. In other words, you have to keep respraying to keep the aphids off. It's a great remedy, as it's highly unlikely to harm anything you haven't sprayed with it (people had been doing it for years before bees started dying inexplicable deaths). The only downside is the plant tends not to be terribly keen on being sprayed with washing up liquid (although the weaker the solution, the better the plant tolerates it, so the real trick is to add just enough to do in the aphids and not enough to do too much damage to the plant).
Black fly on my runner bean plants
Unfortunately the EU doesn't see it that way. Or more accurately, the EU decided to pass a seemingly sensible law banning untested pesticides that had the (unforeseen?) side effect of making home-made remedies such as this (and as far as I can make out, my beer traps too) illegal.

Now. I have no wish to become an EU test case and discover whether they really would prosecute a gardener for spraying aphids with highly diluted washing up liquid, I don't even want to find out whether the suggested defence of "I wasn't using it as a pesticide, I was just using it to wash my plants, the deaths of the aphids were coincidental" will work (according to one article I read, you have a good shot with that defence and a pretty good chance of not being prosecuted at all, as this is certainly not what the EU law is setting out to prevent, it's trying to prevent people from using chemicals even more dangerous and unproven than those already commercially available), so I will not be specifying the means by which the aphids on my plant met their deaths on this blog. What I will say is that if you live outside the EU, regularly spraying with a tiny amount of washing-up liquid diluted in a lot of water is an excellent and safe way of killing aphids (as I know back from my rose growing days before the EU created this law), and that if you want the aphids not to suck the life out of your plant you need to kill them somehow.

Dead black fly on my aphids
If you live inside the EU and fear that it may actually choose to apply this law to you, you can buy an organic spray (this is definitely a lot more expensive than the washing up liquid remedy, but may actually be a good option). Your other cheap option is to squash them to death with your fingers (wear gardening gloves, they're disgusting and sticky when squashed). I'm working on the basis here that you wouldn't fall foul of the law because your fingers wouldn't be regarded as a pesticide (and not that anyone's done the scientific tests to prove that killing aphids with your fingers is safe and effective).

Your remaining option is to buy a commercially available non-organic spray that will kill off a wide range of insects, not just the aphids and may or may not be implicated in colony collapse disorder. On the plus side, some of these are much longer lasting than the washing-up liquid and squashing aphids with your fingers. On the minus side, you will be coating your food crop in a toxic chemical. Indeed, if you're growing a food crop, you will need to make absolutely sure that the pesticide you use says it's safe for your specific plant (and wash your plant very thoroughly before you eat it, those pesticides are nasty and dangerous).

How to plant potatoes

I learned something I didn't expect today about planting potatoes. You don't plant them like any other plant I know of. They start off simple enough.
You dig a 30 cm (12") trench with all the soil piled up on one side, and pop the potatoes in. The BBC website says you plant early potatoes about 30 cm (12") apart with 40-50cm (16-20") between the rows, and second earlies and main crops about 38 cm (15") apart with 75 cm (30") between the rows.
Now comes the strange part. You only fork about 5 cm of soil from your pile back over the potatoes and leave the rest piled up. You then wait until the potato crows about 15 cm above the soil covering it, then fork more of your pile of earth over it until it is covered up to just below the level of its lowest leaves. You then wait for it to grow 15 cm above the soil again, and fork soil from your pile over it until it is covered up to just below the level of its lowest leaves again. You keep doing this (wait for 15 cm of growth then fork the soil over to just below the level of the lowest leaves) until you have no soil left in your pile. This will probably mean that your potatoes end up growing in a little mound of earth by the time you've finished, as replacing all the soil you dug out of the trench on top of the potato plant is likely to put leave you with a mound a little way above ground level. Oh yeah, and don't forget to water them after you've planted them.

Two other things: firstly, you need your potato to chit (that means sprout little green bits) before you plant it - those are going to be its stalk and leaves, so ideally they should face upwards. Secondly, you're wasting your time planting potatoes in September. This isn't the right time to plant them and we planted ours for demonstration purposes only.
Actually, while I'm on the topic of potatoes I learned two other things:
1. The green sprouts they grow are poisonous. Don't eat them, you need to nip them off before you eat a potato if it's chitted (after that you can eat it again).
2. When you harvest your potatoes, you'll almost certainly miss one (or even a tiny bit of one). These are known as volunteer potatoes and will grow again next year. However, because crop rotation is important, you'll be growing other veg in that bed next year, so simply weed the potato out.

Week 3 of the gardening course: how to plant seeds and seedlings

This week's lesson was on seeds, seedling and planting them. It turns out that seeds contain the makings of a whole plant inside them, just waiting to get out:
All they need to germinate is warmth and water. That means you can even germinate them in an airing cupboard. But once they've germinated, they need to come out of the airing cupboard pretty quickly, as they start having a whole host more needs. At that point, if you leave them in the airing cupboard they'll go all leggy because at this point they need light (and if you leave them in the dark, they'll grow overly tall and thin trying to find it). They also need nutrients and carbon dioxide (not that there's any lack of that in your average airing cupboard). Basically, you now need to put them somewhere light, still warm enough for them and provide them with water, and in most cases also soil or compost. It's generally pretty sensible to have provided them with these things (with the possible exception of light) while trying to germinate them too.

Here's us doing some practical work and planting some seeds:
These trays are suitable for little seeds - like lettuce seeds (any seed that's smaller than a few millimetres). Bigger seeds - like beans - would need to go in deeper pots. We put a piece of newspaper in the bottom as it stops any of the compost falling out the holes in the bottom.
Then we filled the seed trays with compost and patted them down so it was nice and firm.
Step 3: read the seed packet, see how deep the seed needs to be and make a trench that deep (with your finger or a pen or something similar). Scatter in the seeds - we were aiming for about twenty in total in each tray, divided over two rows. Some may not germinate, so you aim for a few more than you need, but there's not point in putting 50 in (unless you live with a truly huge group of people) as you just won't need that many lettuces.
We then covered over the trenches by knocking compost back over them.
Step 4: make a label. If you use plastic labels and write in pencil like we did, you can rub the words off with a cloth at a later date and use them again next year. The label should include both the name of the plant and the date.
Finally, and very importantly, water them thoroughly (the two things seeds need to germinate are water and warmth), then put them somewhere warm and wait for them to grow.

We also planted out some seedlings that had already previously been grown in seed trays.
First you gently extract a few from the tray, then gently pull them apart so that the roots separate from each other and you have individual seedlings. You should be fairly gentle with them, but you're bound to break some of the roots off. This doesn't matter, the seedlings can cope.
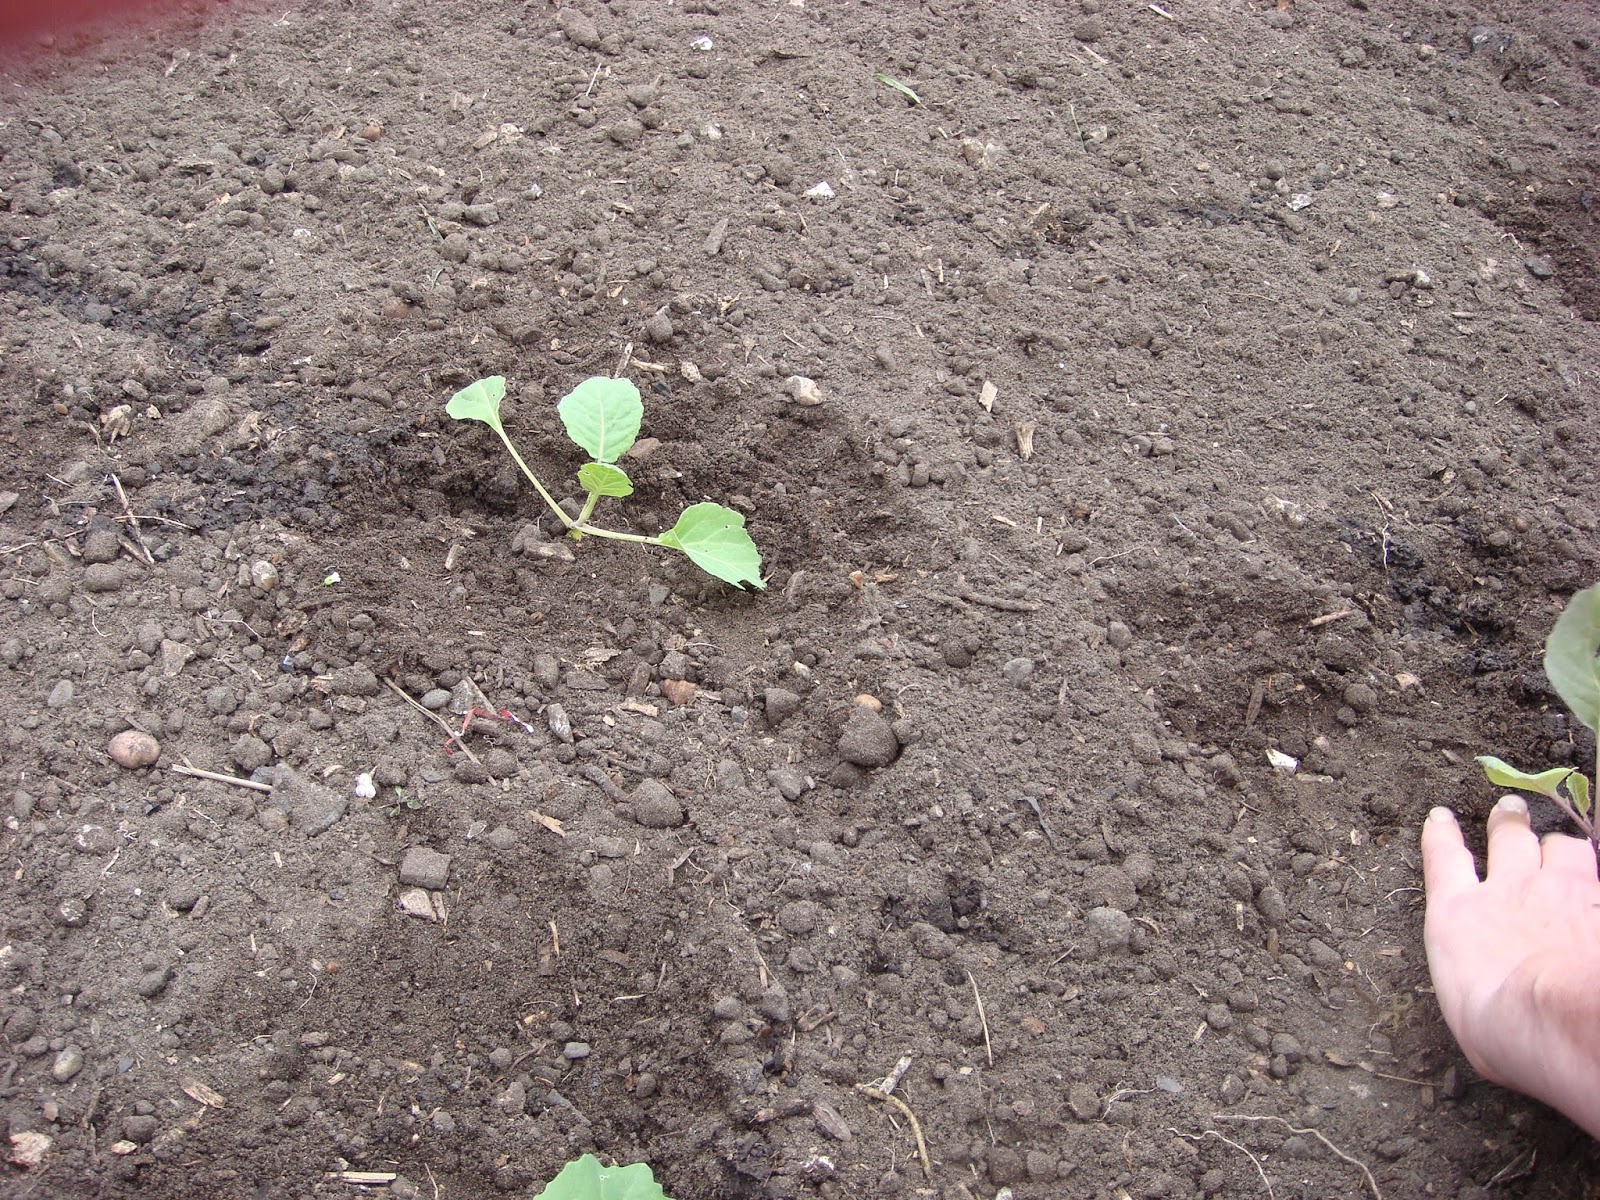
Dig holes at the correct distance apart. It'll tell you how far on the packet. These were cabbages and we were putting them in at 45 cm apart. Unlike with planting seeds, when you plant seedlings you're supposed to water the hole first. It gives their roots a better chance of taking to their new home.
You can (and even should) plant brassicas like cabbages with a fair amount of their stems buried under the ground, but with all their leaves and their stalks above the ground. Push the soil in around the plant and firm it down with your hands. It should be pretty firm, If you pull on the plant by one of its leaves, the plant should remain firmly embedded in the ground.
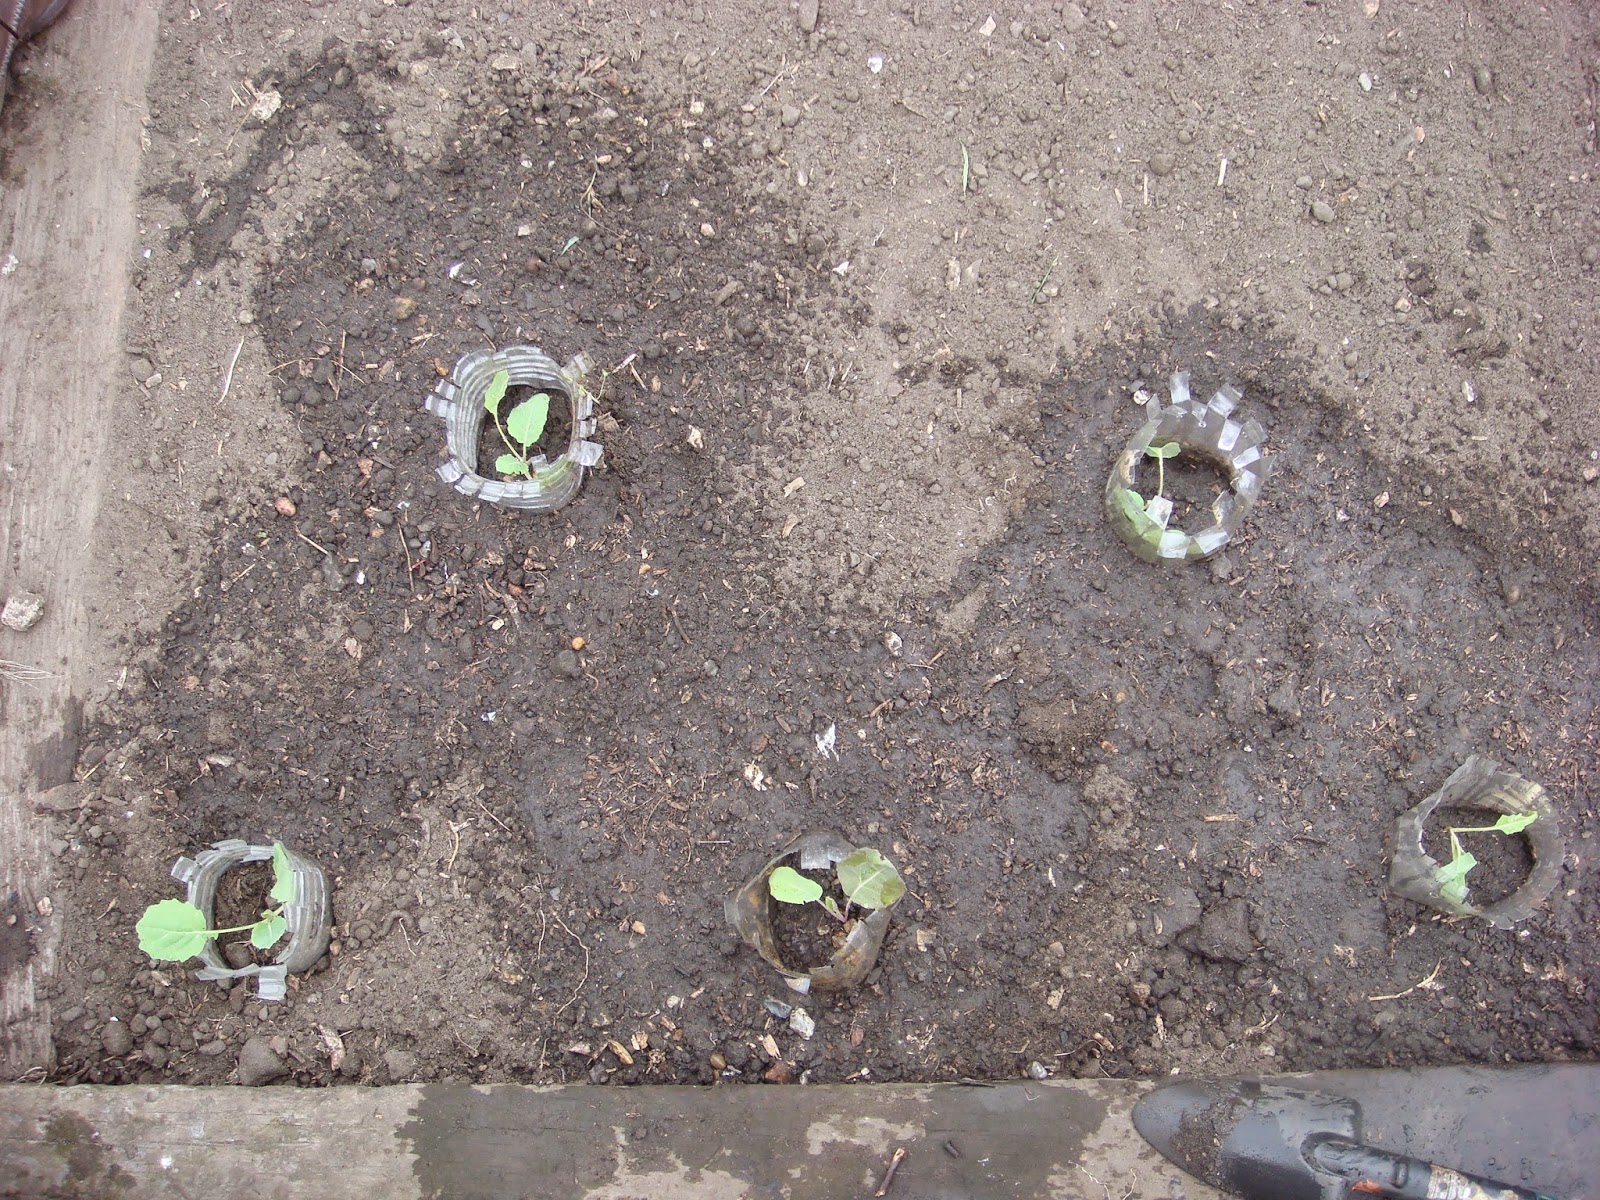
We then added these cut out bits of bottles. They give the seedling some protection against slugs.
 The next step: water them again.
Because brassicas are greedy feeders (they need a lot of nutrients), our teacher, Simon, added some hop manure pellets. You'd probably need to add another form of fertiliser, as he said these weren't commercially available any more. Our cabbages got the pellets because because that was what he'd happened to find in the shed.

Tuesday, 23 September 2014

Crop rotation - the plant families

This week's gardening course lesson was on crop rotation. Those crops that grow from scratch every year (as opposed to those that grow on plants that remain in place year after year such as fruit trees, raspberry bushes and asparagus) should be grown in a different part of your plot each year (i.e. rotated between the areas or beds you use to grow vegetables). This helps prevent the build-up of soil borne pests and diseases. If you put the same vegetable in the same place year after year your yield from it would fall, the health of the soil would decline and you'd see a build up of pests and diseases.

But it's a little bit more complicated than that. For instance, there's no use in putting in cabbage one year and replacing it in the next with radish, because, weirdly enough, both are brassicas, so they are prone to similar diseases and pests and needs similar levels of nitrogen.

The first step in planning your crop rotation is to work out what food plant family your plant belongs to. Here are the groups along with a list of key vegetables that belong in them. There are some surprises in there (especially vegetables that you would think would count as roots, which are actually in another family):

The Brassica Family
  • cabbages
  • Brussels sprouts
  • cauliflowers
  • radishes
  • broccoli
  • calabrese
  • swedes
  • turnips
  • rocket
  • Chinese cabbage
  • cress
  • kale
  • kohlrabi
  • land cress
  • mizuna
  • mustard
  • oriental mustards
  • pak choi
  • salad rape
  • seakale
  • agricultural mustard
  • fodder radish

The Root Family
  • carrots
  • parsnips
  • celery
  • coriander
  • dill
  • parsley
  • celeriac
  • Florence fennel
  • Hamburg parsley
  • skirret
The Legume Family
  • broad beans
  • runner beans
  • French beans
  • mange tout
  • peas
  • asparagus peas
  • lablab beans
  • any other form of beans
  • alfaalfa
  • clover
  • fenugreek
  • field beans
  • lupins
  • trefoil

The Potato Family
  • potatoes
  • aubergine
  • peppers
  • chilli peppers
  • tomatoes


The Beet Family
  • beetroot
  • chard
  • spinach
  • Good King Henry
  • leaf beet
  • red orache


The Allium Family
  • onions
  • garlic
  • leek
  • shallot
  • chives
  • bunching onions
  • spring onions
  • Welsh onions


The Cucurbit Family

  • cucumber
  • courgette
  • marrow
  • melon
  • water melon
  • pumpkin
  • squash
  • summer squash
  • winter squash


The Lettuce Family
  • chicory
  • cardoon
  • lettuce
  • endive
  • cardoon
  • globe artichoke
  • Jerusalem artichoke
  • salsify
  • scorzonera


Other (also known as orphans) - they don't belong in any other group or really together
  • sweetcorn
  • sweet potato
  • asparagus
  • sorrel
  • Chinese artichoke
  • corn salad
  • New Zealand spinach
  • sorrel
  • summer purslane
  • winter purslane
  • buckwheat
  • grazing rye

So, when you're trying to work out your crop rotation, you should try and include all the vegetables you want to grow in a single bed or area to be rotated so vegetables from the same family don't end up in the same area more than once in your rotation. But, you can include vegetables from more than one family in each bed to be rotated.

But in addition to taking plant families into account, some plants need different levels of nutrients in the soil. Some plants fix nitrogen in the soil (i.e. they add nutrients), some are greedy feeders and need lots of nitrogen, some need lower levels of nitrogen (because if they have too much they grow funny) and some are neutral - i.e. they can take any level of nitrogen and can be planted together with plants of any of the other groups.

The ideal pattern for plants in a crop rotation is that nitrogen fixers should be followed by greedy feeders, which should be followed by plants needing less nitrogen (which should then be followed by nitrogen fixers again). If you can't put nitrogen feeders in before greedy feeders, then you should feed the soil over winter before planting the greedy feeders.

Here are the groups:

Nitrogen fixer Greedy feeder Less nitrogen Any level of nitrogen
legumes,
e.g. peas, beans
brassicas
cucurbits
potato family
alliums
sweetcorn
root family lettuce family
beet family
orphans (except sweetcorn)

Other facts worth taking into account (once you've got to a more advanced level, they might be too much to cope with in your first attempts at rotation):

  • If you are repeating a crop, such as potatoes, within a rotation, the two occurrences should be as far apart as possible.
  • Potatoes and cucurbits leave a clean soil and are good to precede root crops, which benefit from a clean seed-bed.
  • If you need to lime soil for brassicas, don't follow them immediately with potatoes (lime encourages potato scab).
  • Although the rules theoretically mean you could grow tomatoes alongside potatoes (as they are both in the potato family), the risk of potato blight spreading to your tomatoes is high enough that it's better to grow them as far apart as possible.

You can rotate crops on a four year or a six year (or presumably also a five year) basis. The crops should be rotated like this in a four year rotations:

Year 1 Crop A Crop B Crop C Crop D
Year 2 Crop B Crop C Crop D Crop A
Year 3 Crop C Crop D Crop A Crop B
Year 4 Crop D Crop A Crop B Crop C

The Royal Horticultural Society's website suggests this crop rotation:

Year 1LegumesBrassicasPotatoesOnions and roots
Year 2BrassicasPotatoesOnions and rootsLegumes
Year 3PotatoesOnions and rootsLegumesBrassicas
Year 4Onions and rootsLegumesBrassicasPotatoes

If you want to do a six year rotation, here's the pattern:

Year 1Crop ACrop BCrop CCrop DCrop ECrop F
Year 2Crop BCrop CCrop DCrop ECrop FCrop A
Year 3Crop CCrop DCrop ECrop FCrop ACrop B
Year 4Crop DCrop ECrop FCrop ACrop BCrop C
Year 4Crop ECrop FCrop ACrop BCrop CCrop D
Year 4Crop FCrop ACrop BCrop CCrop DCrop E