Saturday, 28 November 2015

Carrot and beetroot harvest

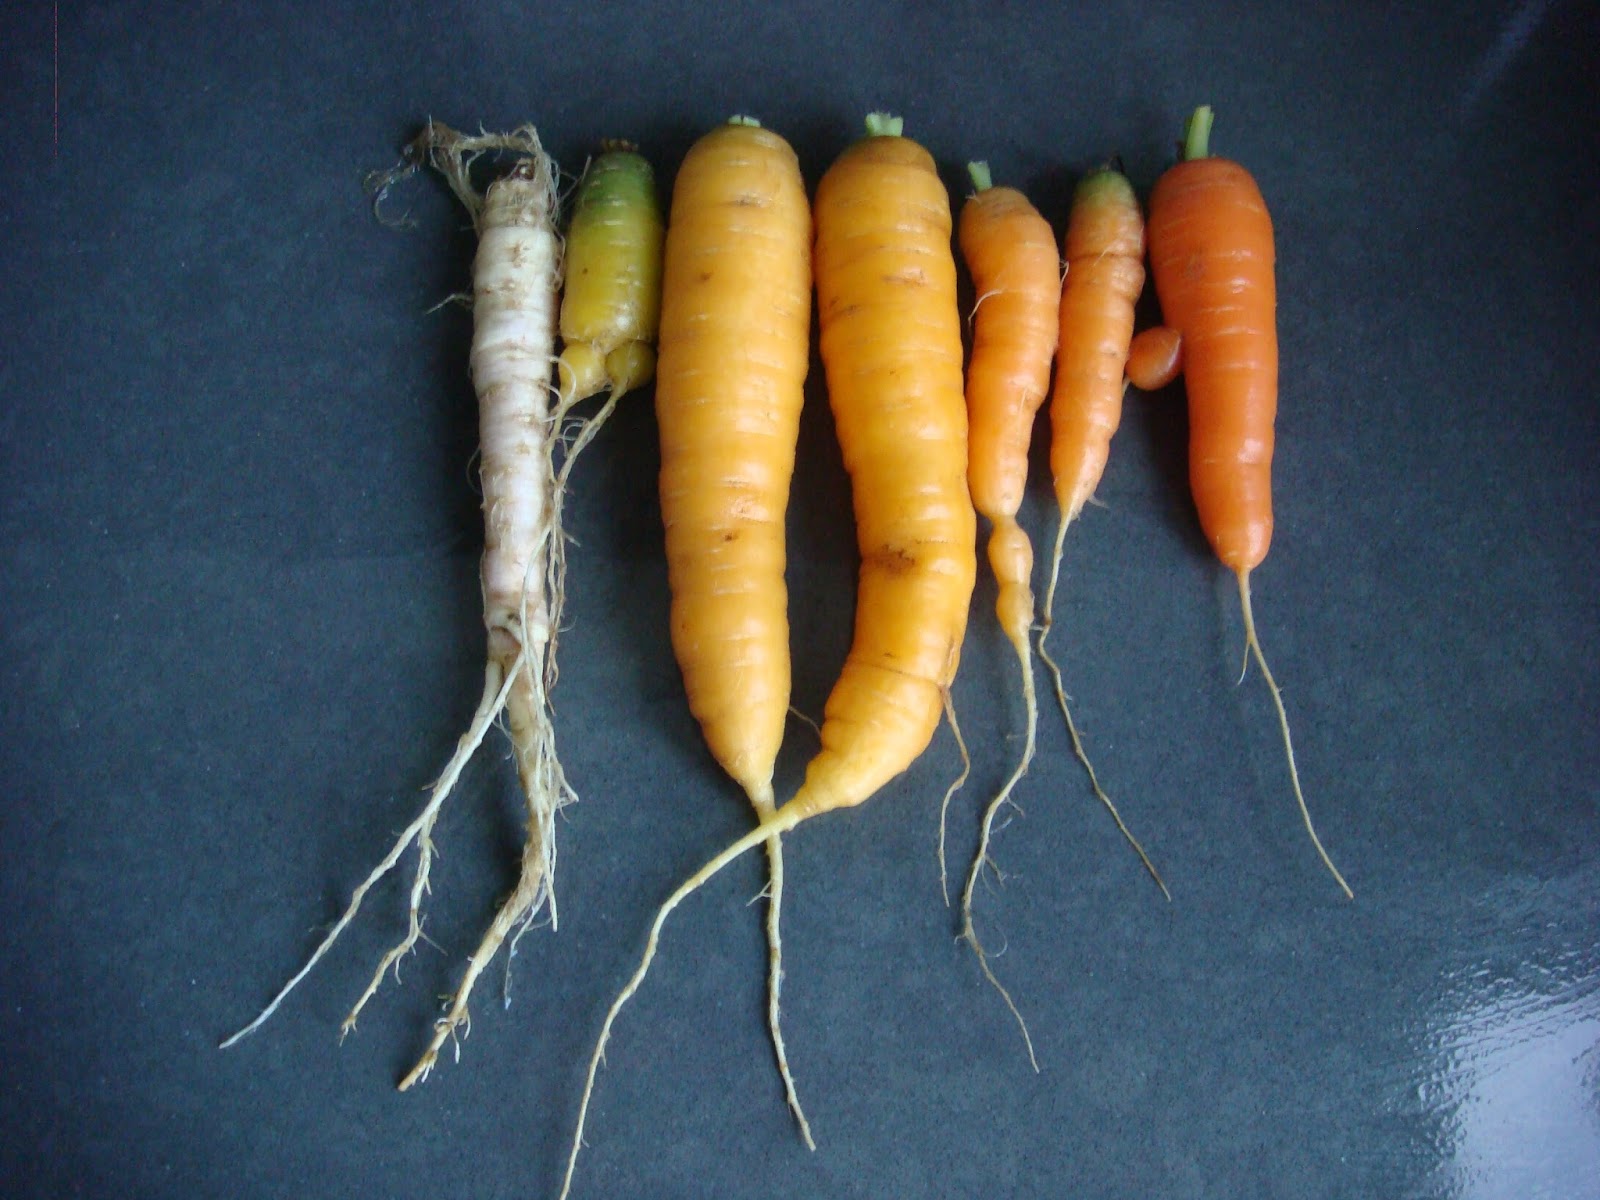
We've started going down to freezing temperatures at night and I wasn't convinced that repeatedly freezing and thawing was going to do my carrots and beetroots any good, and nor I wasn't sure how much protection the soil is from the frost. Anyhow, we gathered them in and they look so cool (and the carrots look surprisingly straight given that hey were growing in stony ground).

Sunday, 22 November 2015

First frost and cayenne pepper success

We had our first frost of the season last night. My nasturtiums in the front garden have clearly not survived it, which made me rather worried for my back garden vegetables.

So I went out to have a look at if my cayenne peppers or bell peppers were still salvageable. The answer with the bell peppers was a resounding no, the answer with the cayenne peppers appears to be yes:

But I can't imagine they like frost, so I picked them and brought them in. Cayenne pepper strikes me as way too hot for me to eat in fresh pepper form - I can more imagine accidentally ruining a chilli con carne, so I pretty much don't dare to put them in food. Instead, I have two potential plans for them. Firstly I'm planning to include them in a Christmas wreath and secondly, we've had a spate of fox clubs chewing the ends off car aerials in our area (ours has already been partially masticated), if that starts happening again I'll be then I'll be giving fox cubs the shock of their lives with cayenne juice rubbed on the aerial.
In rather less good news, my leeks are all having to go in the bin, they have some sort of red insect in them. A search of the Internet suggests that a) the pests are allium leaf miners and b) now I have them the only remedy is disposal and crop rotation to avoid them coming up in next year's. They're in all of my leeks, so we're going to dig them up as soon as the ground becomes workably warm. The correct solution, which I've now discovered too late for this year is I should also have added a horticultural fleece from October to November as barrier protection to protect the leeks from them.
Probably an allium leaf miner

Monday, 2 November 2015

How to make leaf mould

Leaf mould is a kind a nice, rich kind of compost that you make from leaves. I went and gathered my leaves in a neighbouring street, as my garden only has one tiny tree and there aren't any trees down our road. The neighbouring road in question is a nice quiet one. This is good for two reasons: 1. fewer people pass by to give you strange looks for gathering up leaves from the pavement and street and 2. the trees haven't spent all year being polluted by vehicle fumes (conventional wisdom is that this is a bad thing for the compost you make).
So, here are the instructions:

1. Gather some leaves in a plastic bag the size of a bin liner.

I found the most efficient way of doing it was to sweep the leaves together with a garden broom, then use a dustpan and brush to grab them and deposit into the bag - more like using tongs or chopsticks than like using a dustpan and brush.
The BBC says: Oak, alder and hornbeam will soon rot down, while sycamore, beech, horse chestnut and sweet chestnut take a little longer. Leaves from conifers and evergreen plants will take between two and three years to compost and are best added in small quantities only, shredding them first to help speed up composting.
I don't have the faintest idea what sort of leaves I've gathered. Some small, red thick ones at the top of the bag and some large yellow, thin ones underneath. Given that the yellow ones had already started to rot in the road, I think the rough rule of thumb is the thicker the leaf, the longer it takes to rot.

2. Poke some holes in the bag.

My bag came with holes already in it, as it was previously the bag the council gathered garden waste in before they switched their system and they never survive more than two collections without the addition of a few tears.


3. Sprinkle on some water - not too much, you don't want them to go slimy (in fact that's what the holes in the bag are for, to let water out and stop them getting all slimy).

4. Tie up the top of the bag and leave somewhere shady and not too conspicuous for 1-3 years (1 year = low quality leaf mould, 2 years = high quality leaf mould providing you've used easy-rot leaves, 3 years = high quality leaf mould even if you used stubborn leaves.

I'm leaving mine behind the shed, at least until we get a new shed. Then I'm going to have to think of a new home for it.

Sunday, 1 November 2015

Season of mists and mellow fruitfulness in the vegetable garden

The weather's turned misty and cast its effects across the garden. The garden's looking a lot neater, as my husband cut the lawn, neatened the edges and dug over the cucurbit patch.
It's certainly a lot neater than it was less than a month ago (the brown things in the middle of the lawn are sunflower heads that I put out for the birds, but they showed no interest).


Wednesday, 28 October 2015

Roasting winter squash

This is how I roasted my winter squash for my latest batch of autumnal winter squash soup. First I cut it in half and scooped the seeds out. Then I cut it into segments like this:
I didn't peel the skin off them first because with winter squash sweet dumpling the skin is so tough it's hard enough to cut them, peeling them raw is practically impossible.
I then poured olive oil on them and squooshed them around in it to make sure they were thoroughly coated before baking them for 45 minutes in a 190° oven. They came out all squishy and delicious. It's possible I could have got away with a slightly shorter bake time.

50 shades of carrots


I picked carrots from the line that's supposed to have white carrots in it and got a variety of colours. The pure white ones are generally practically inedible, they're so tough and scrawny. I got the seeds form the allotments where I did my course. They'd produced them themselves. I suspect their white carrots of having mated with orange carrots, hence the variety of colours. I might give it a go from the seed they look like they're trying to produce themselves this year - some of the carrots from the line decided they were annuals not biennials (=flower in the 2nd year) and bolted, so I may get seed.

Wednesday, 14 October 2015

Autumnal winter squash and ginger soup

When I found two of my squashes lying rotten on the ground, I decided it was time to harvest.
In terms of storage, I've had to compromise. Not having a cool room to put them in (the shed absolutely boils when it's sunny), I've decided to store them as decorations in the lounge.

I've already eaten a couple of them in soup.  It was tasted of autumn (and would have been vegan if only I'd used a different vegetable stock, but didn't make my husband complain about lack of meat so must have been good.)

Here's the recipe (all amounts are approximate and can be varied), you will need a blender or similar device to blend this, although it's probably pretty nice even without blending:
Autumnal winter squash & ginger soup
Ingredients
2-3 tbsp olive oil
1 bay leaf
2-3 tsp garlic, crushed or chopped (I used frozen)
2-3 tsp ginger, crushed or chopped (I used frozen)
1 tsp ground cumin
1/2 tsp nutmeg
1 tsp dried rosemary
2 medium onions, diced
2 large potatoes, cubed into c. 1 cm cubes (skin left on)
500 g carrots, sliced (skin left on)
1 medium and 1 small sweet dumpling winter squash, deseeded and roasted with the skin still on
1 vegetable stock cube
boiling water, enough to cover veg (probably about a pint)

Method:
0. Roast the squash in advance. See link. NB I roasted mine by halving them, scooping out the seeds, smearing them in olive oil and putting them on a baking tray on the bottom shelf of fan oven for an hour at 190 degrees while I was roasting some beef on the shelf above.
1. Heat oil in a large saucepan on a low heat and add bay leaf, garlic, ginger, cumin, nutmeg and rosemary.
2. Add the chopped onions and fry until soft, stirring occasionally.
3. While the onions are sauteeing, prepare (=wash and cube into 1 cm cubes) the potatoes. Add these as soon as the onions are nice and soft.
4. Keep stirring the veg in the pan occasionally and while doing this prepare (=wash and slice) then add the carrots.
5. Keep stirring the veg in the pan occasionally and while doing this separate the squash from its skin and add the flesh of the squash to the pan of veg. I recommend spooning/scraping the flesh of the squash out with a spoon.
6. Crumble in the stock cube into the pan, then add the boiling water to cover of the vegetables.
7. Bring to a simmer, put the lid on the pan, turn the heat down very low and leave on a low heat for 20 minutes.
8. Allow to cool until cool enough for your liquidising device, remove bay leaf and liquidise in batches. If the soup is too thick for your tastes, add more water.
Serve with crusty bread or any other bread you like eating with soup.

I also decided to harvest the final courgette.
It still feels firm and produces a sound that sounds like it's firm on the insides when I tap it, so I think it's still good. I'm going to make curried marrow soup with it. I'm almost certainly going to adapt the recipe, partly as I have no idea what they mean by the instruction "cut the ends of the marrows", partly because I'm using an outsized courgette instead of a marrow and partly because I habitually adapt recipes to match the ingredients I have in the house.
Update: made the soup, it needed two saucepans to fit all the courgette in. It wasn't as nice (or as pretty) as my squash soup and I had to add extra curry powder for flavour (and also some olive oil for texture).
Update 2: both the courgette soup recipes on my blog in 2017 taste much better than curried marrow soup, especially this one, but also this one.